Warning: This is extremely long.
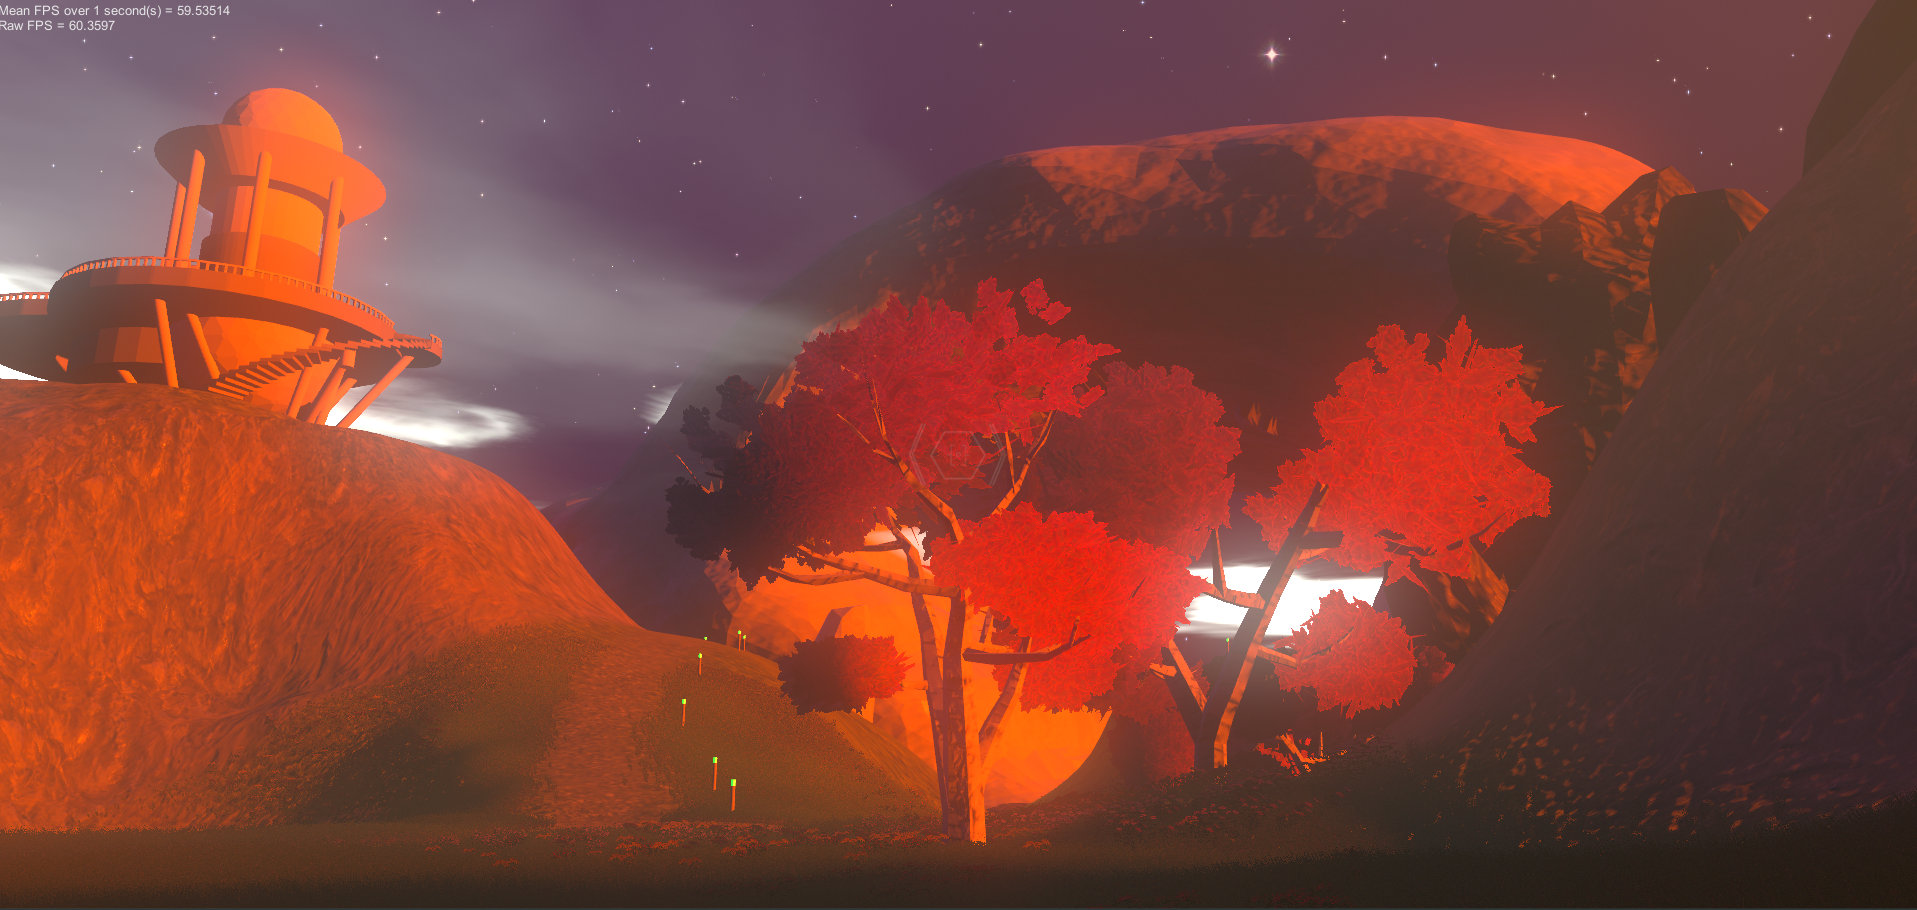
We are making Utopias, and my Utopia needs trees. I tried the Unity tree tool, and the results looked kind of shrivelled up and not very luscious. So I tried to make my own, and the experience was quite tedious, but worth it. I have documented it as a step-by-step guide to help others make more luscious trees.
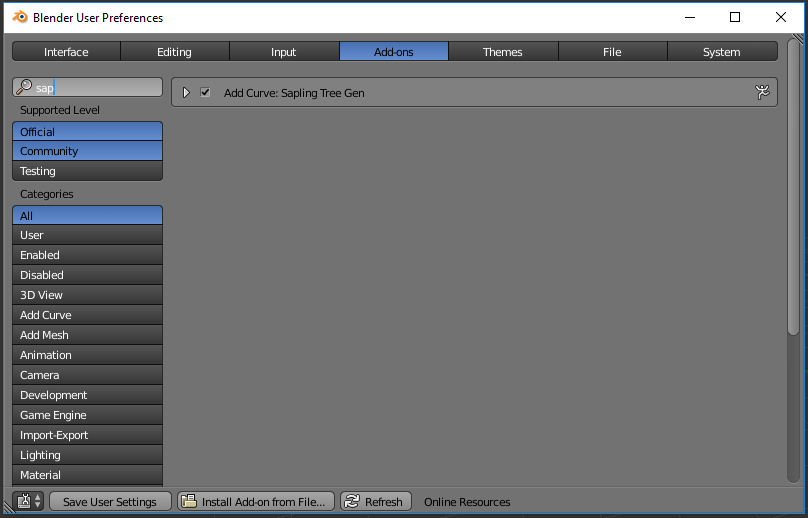
Blender automatically comes with an Add-on to generate trees. Let's enable it by going to User Preferences > Add-ons > Sapling Tree Gen.
Get rid of the default cube. Make a new tree with Shift + A > Curve > Sapling Tree Gen.
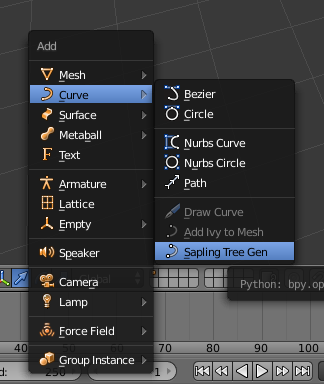
If you don't see the Sapling: Add Tree options panel, press T to open it. There's lots of options inside to configure.
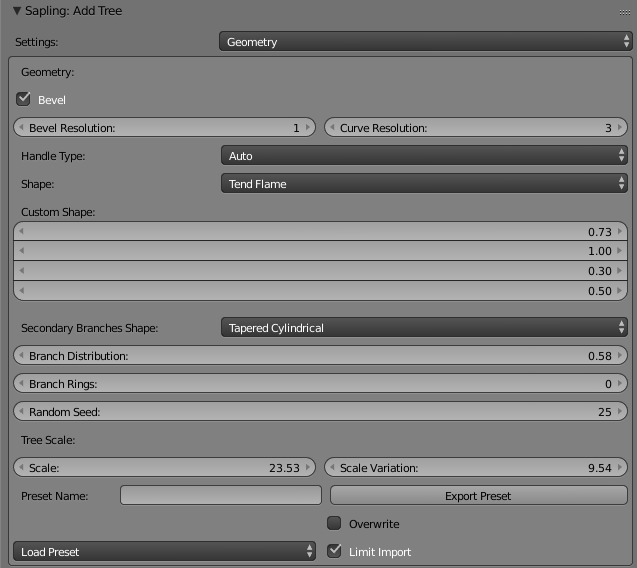
Let's start by checking Bevel box to give it a mesh on the curve.
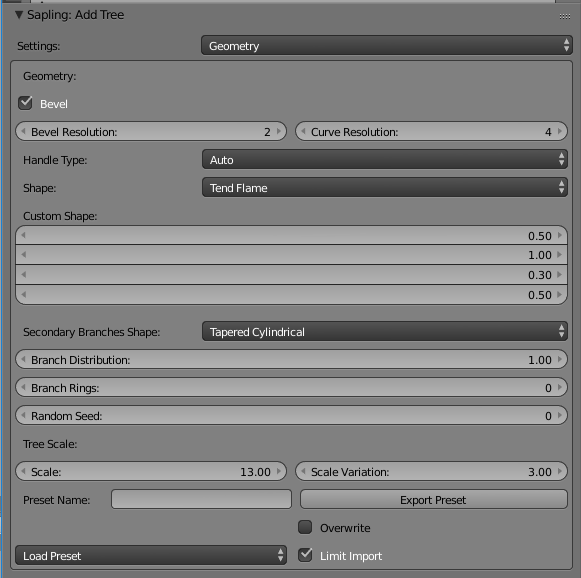
I changed the Bevel Resolution to 2, to make the bevel less square (with more polygons). You can increase this as you like for more polygons and thus a smoother trunk.
Now we customize the tree.
Let's start with how the branches look.
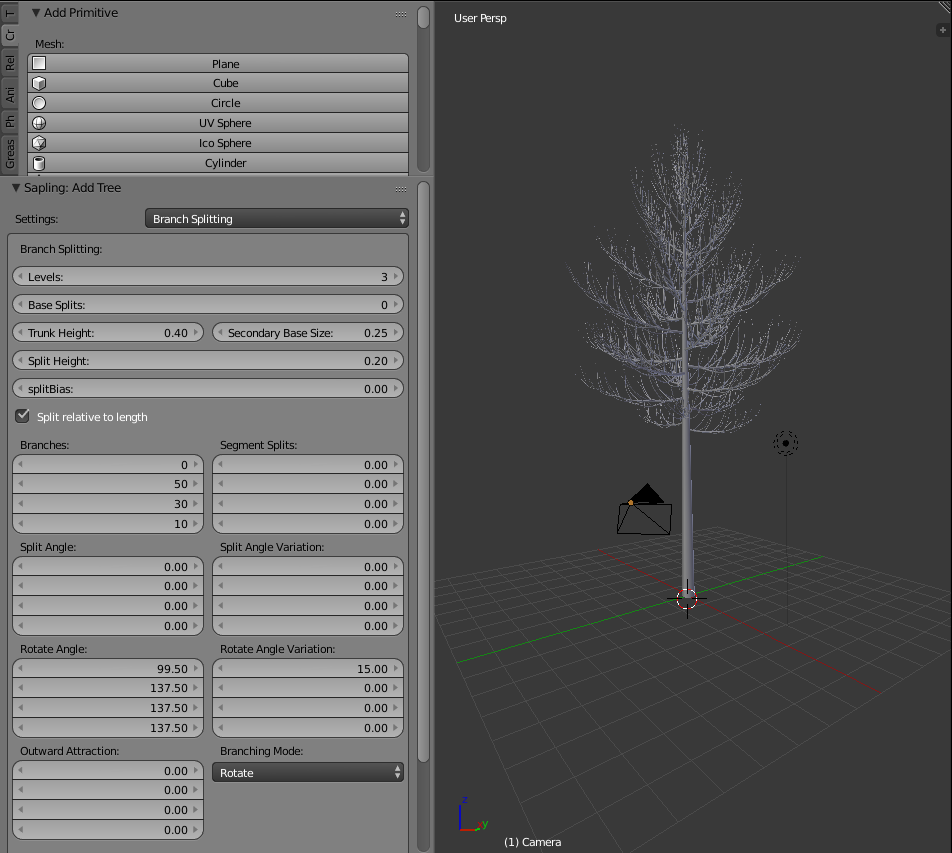
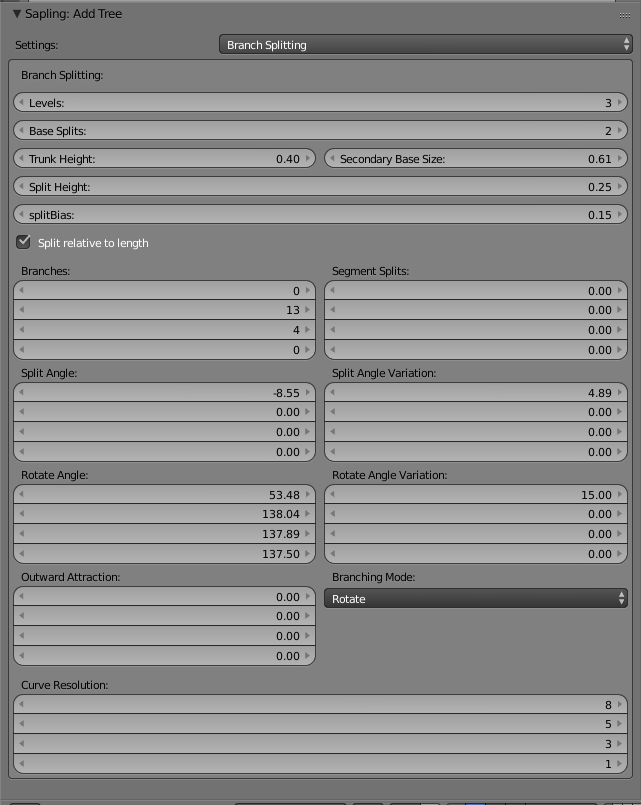
Click the Settings drop down and select Branch Splitting.
Levels is how many times each branch splits into new levels of branches.
Base Splits is how many times the trunk splits.
Trunk Height is how tall the trunk is until branches start to grow out of it.
Secondary Base Size is how far along the branches the sub branches will form.
I messed with the settings a bit, and now my tree looks a bit like a lollipop. Nice.
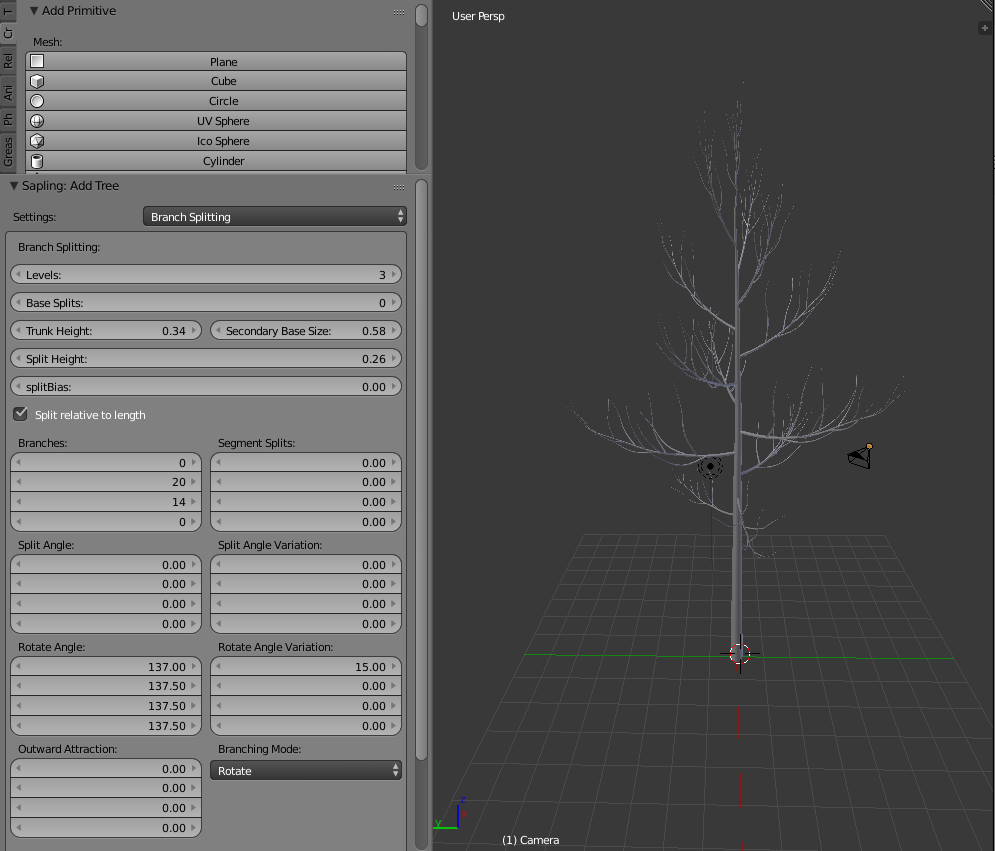
Let's further explore these parameters.
Here, I adjusted some settings like Trunk Height, reducing the number of Branches and distributing them fairly sparsely. I’m doing this cos this tree is for Unity and I want to somewhat reduce the complexity for performance and aesthetics reasons.
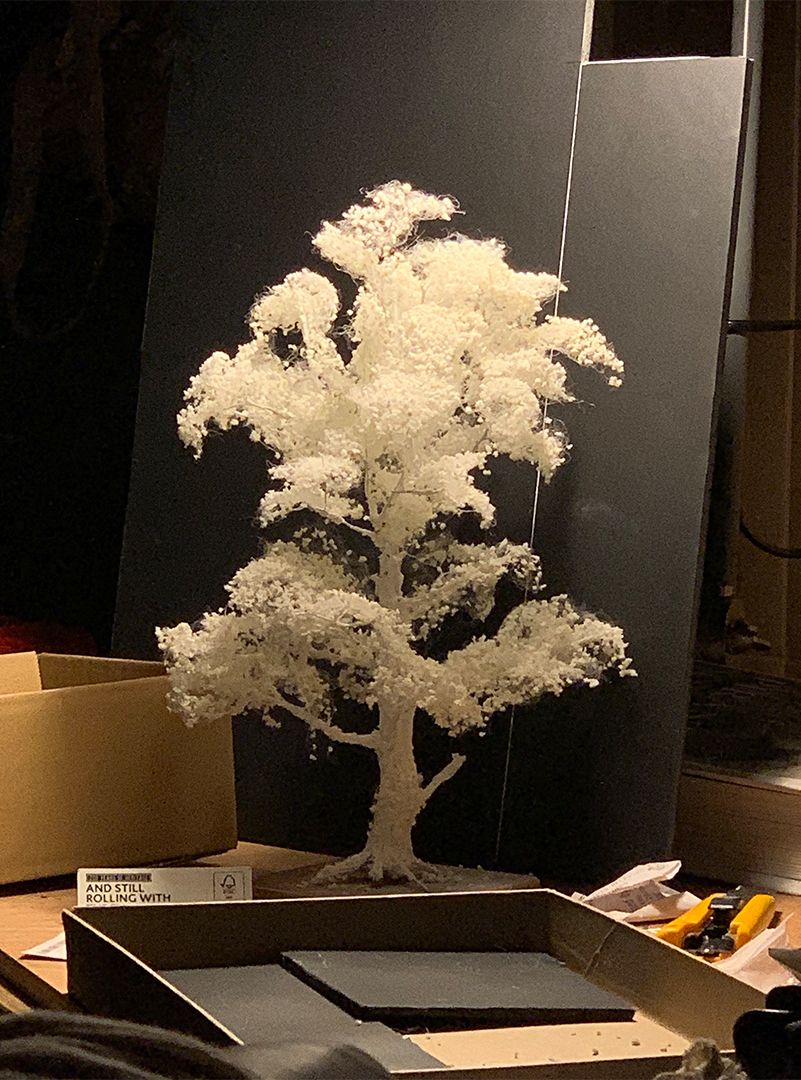
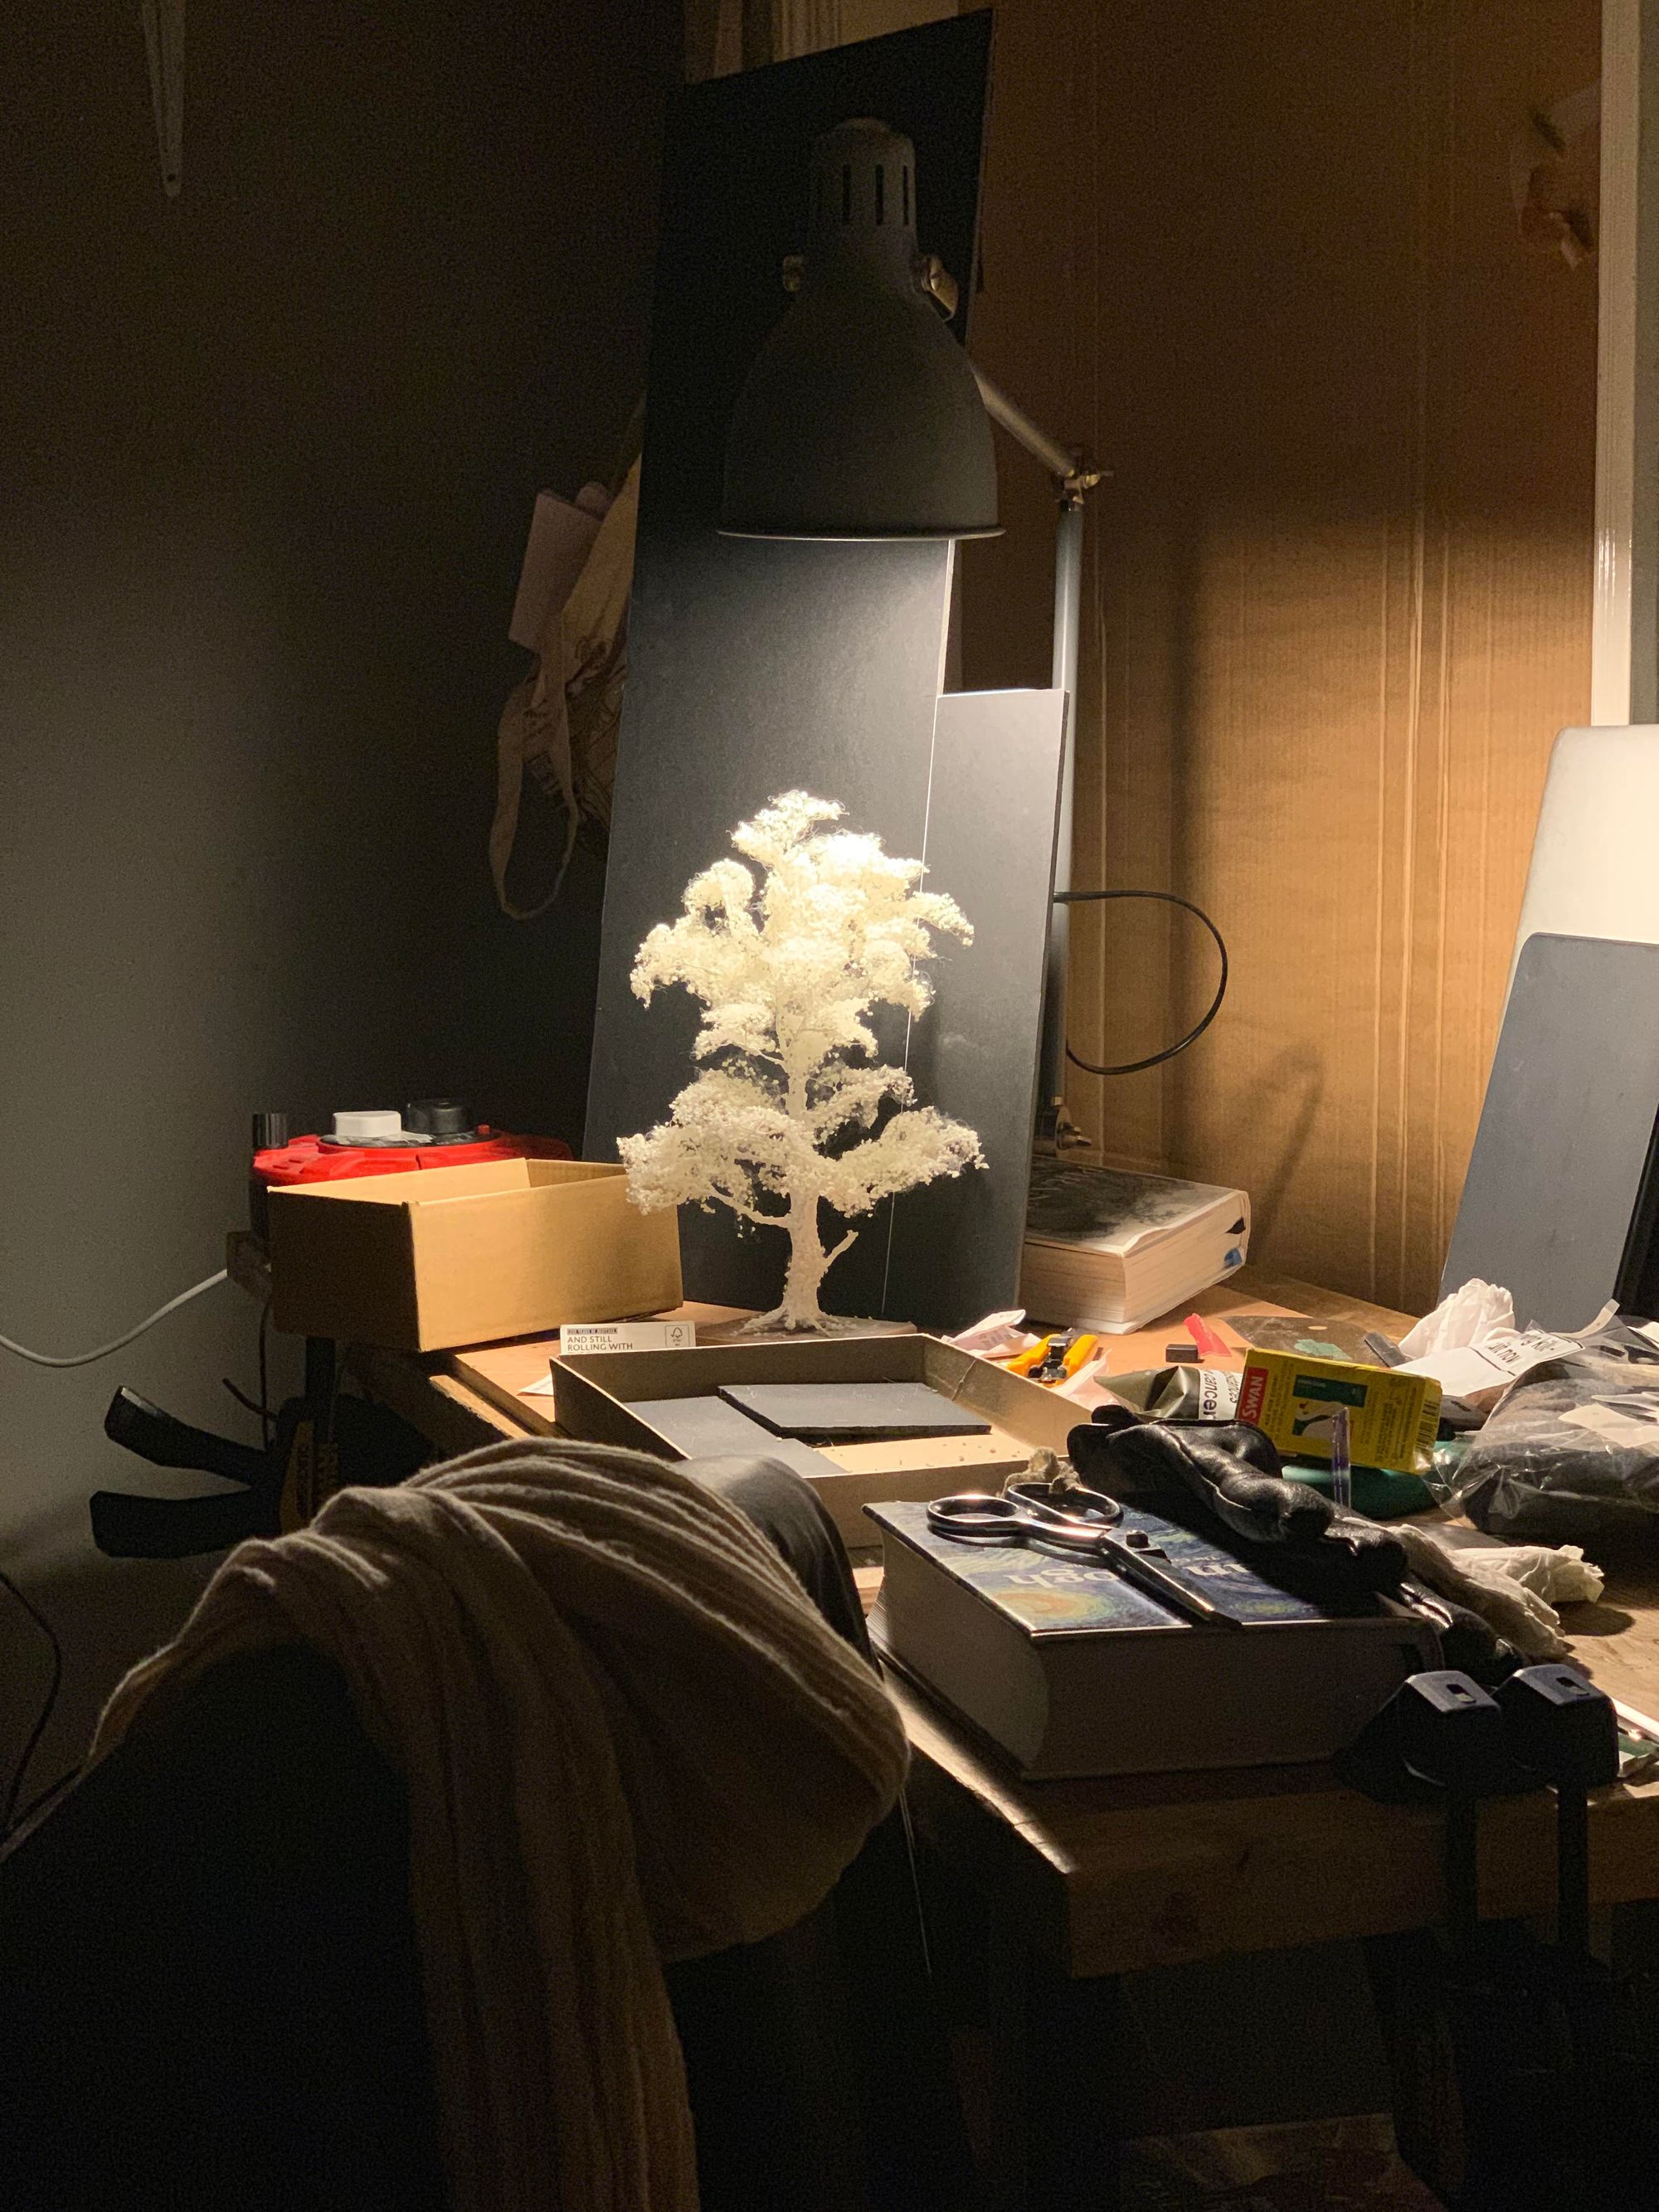
I’m aiming to make the tree look a bit like a sculpture my friend Stephen Appleby-Barr made.
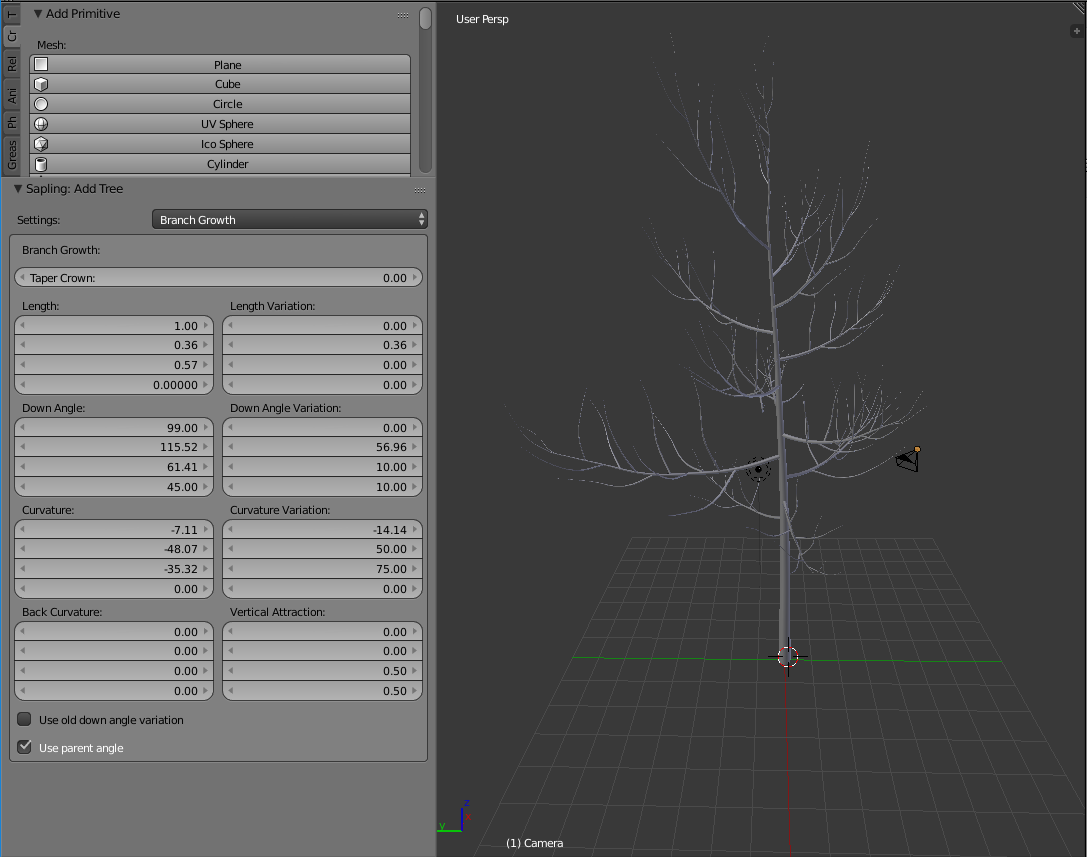
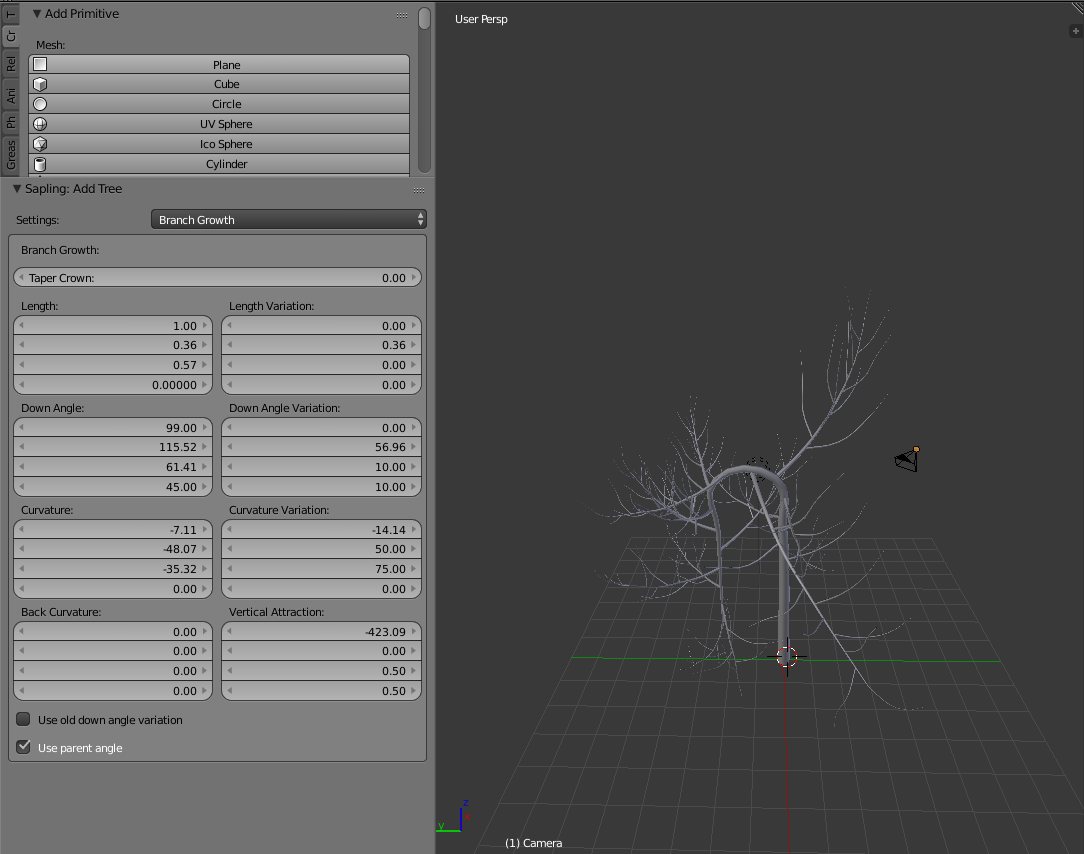
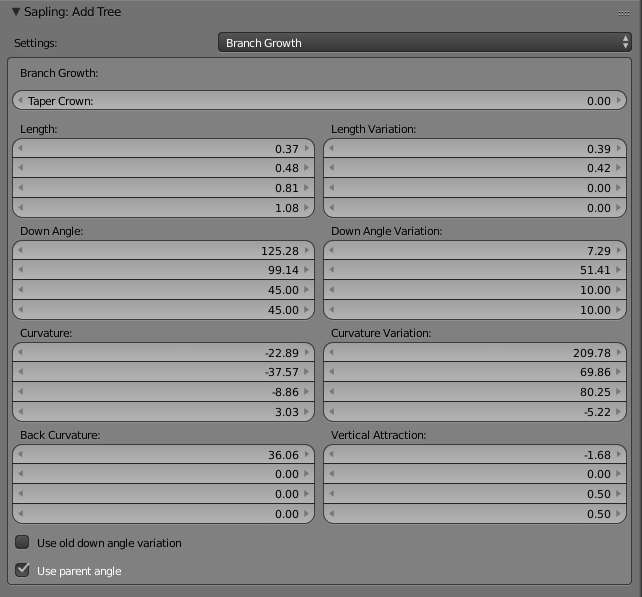
In Settings, hit the drop down and select Branch Growth. I wanted my tree to have a more heavy, wide and slightly drooping look, so in Length I extended the branches a bit and added some variation. I increased Down Angle settings to make the branches lay more downwards, flatter, and added some variation for fun.
I added some Curvature to make it less straight, like just a bit more wiggle.
Ok, just for fun, I made the Vertical Attraction a negative value, and you get like a funny droopy tree... but then I set the value back to 0 before continuing. (FYI, while in the Sapling: Add Tree editor panel here, hitting undo will kill the whole Sapling and set you back to nothing. Just something to remember when you're messing around.)
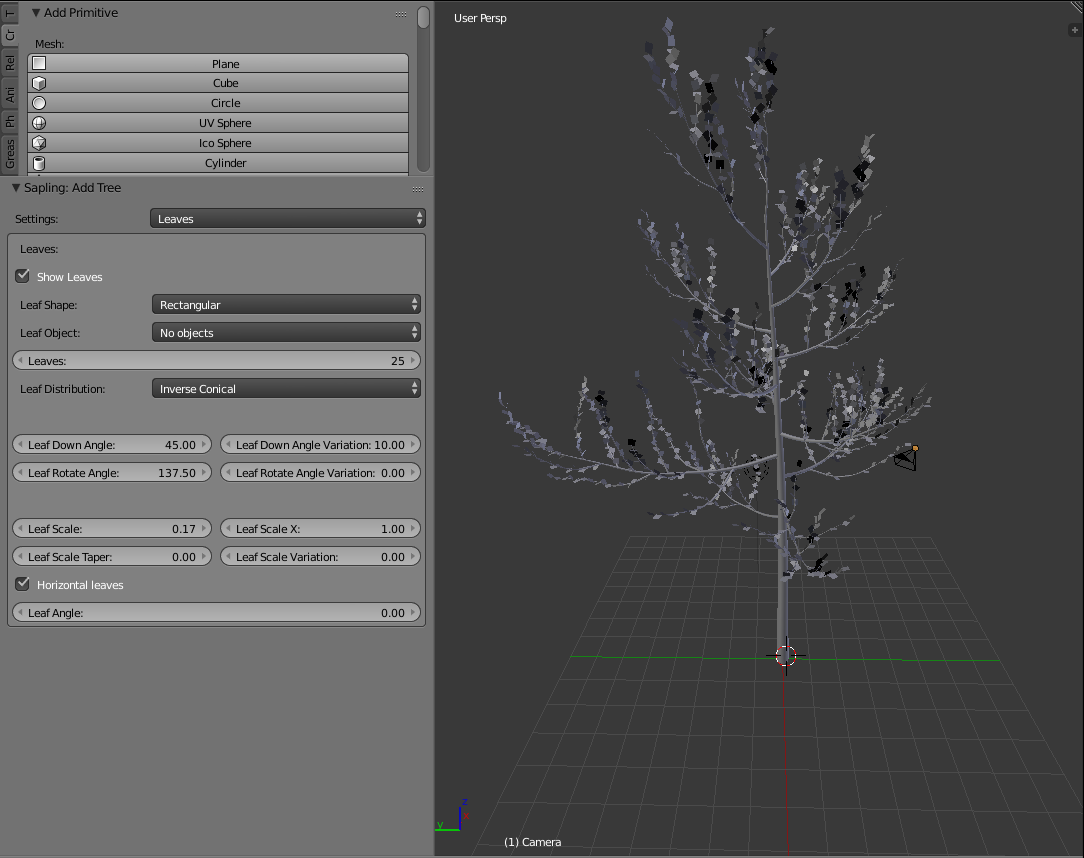
So now we have the tree trunk. We can also add leaves here with Sapling Tree Gen. Go to the Settings drop down again, and select Leaves. Change the Leaf Shape to Rectangular. I'm doing this cos I'm going to use a square leaf texture later to replace all those square planes. Click Show Leaves checkbox, and now there's some squares for leaves.
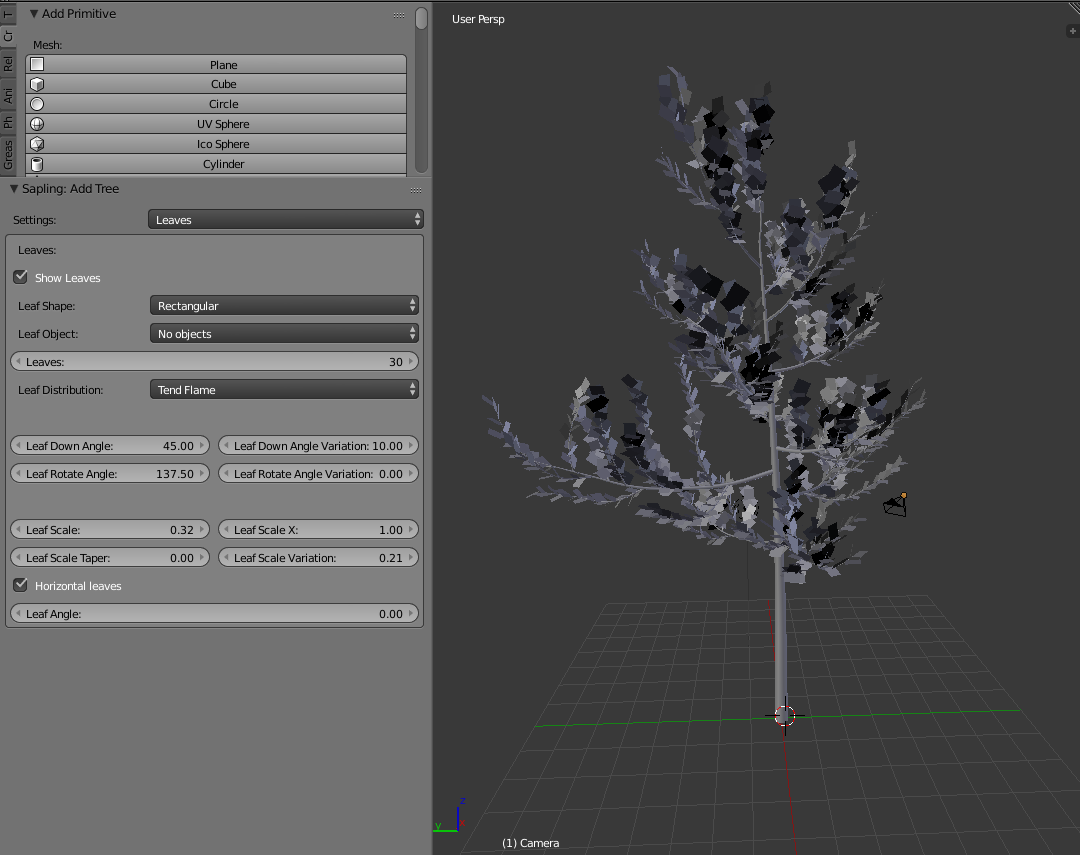
I adjusted the Leaves number to 30, and increased the Leaf Scale and Leaf Scale Variation. It looks OK, pretty sparse tho. But like a tree, probably.
Let's clean it up a bit for Unity and see how it looks in engine.
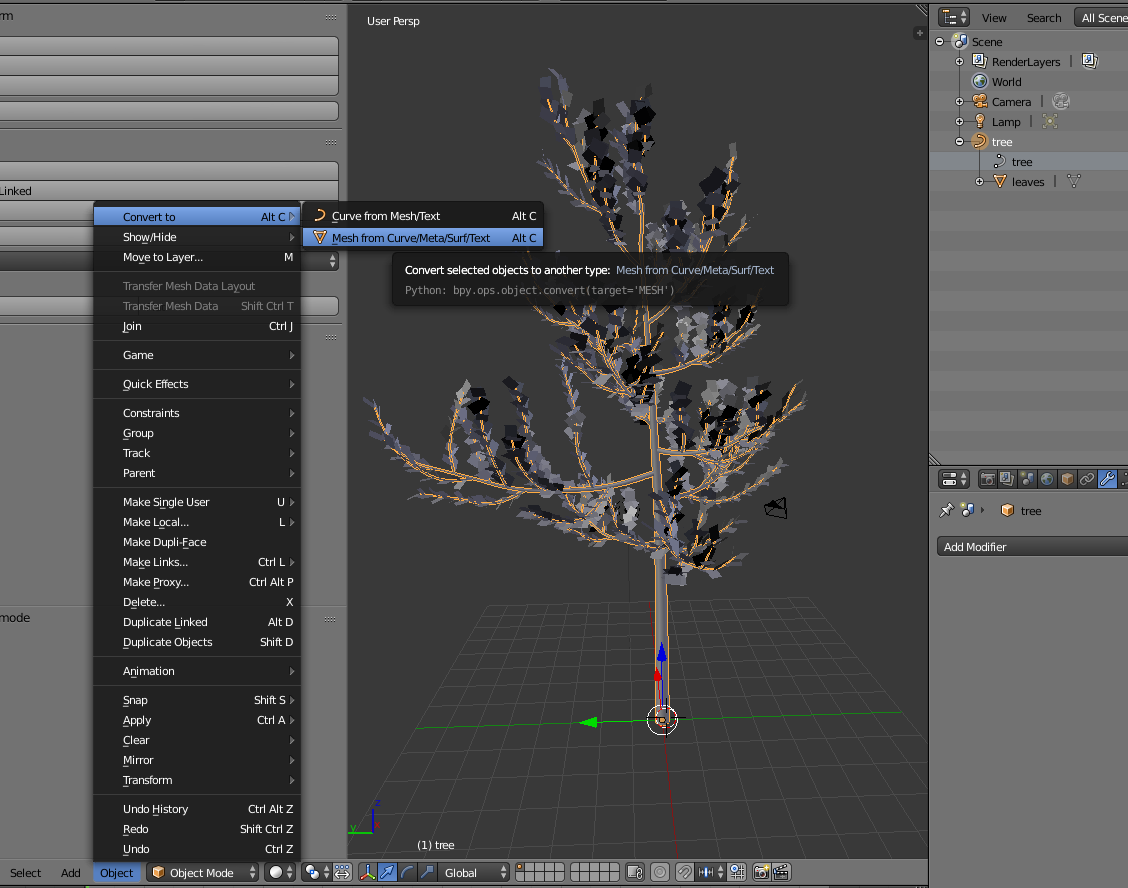
Convert the bevelled curve that is the trunk to a mesh. You can find that under Object > Convert to > Mesh from Curve/Meta/Surf/Test.
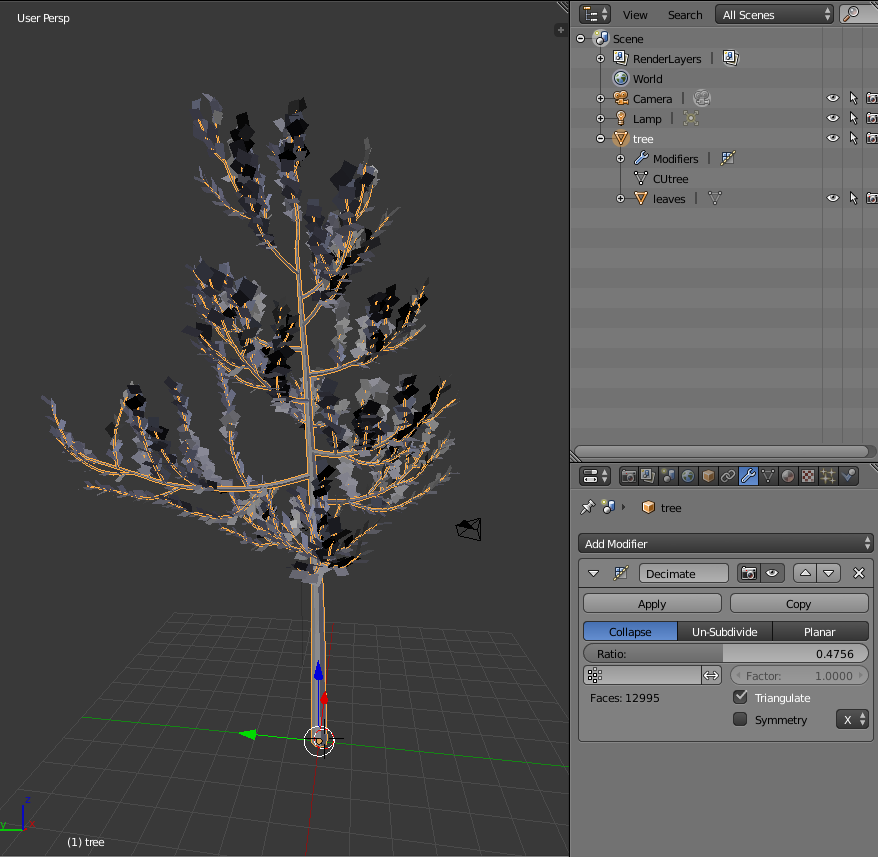
I like to decimate the trunk to remove some polygons, but that's up to you. You can do that by clicking the tree, and in the Modifiers tab click Add Modifier > Decimate and lowering the Ratio. Click Apply.
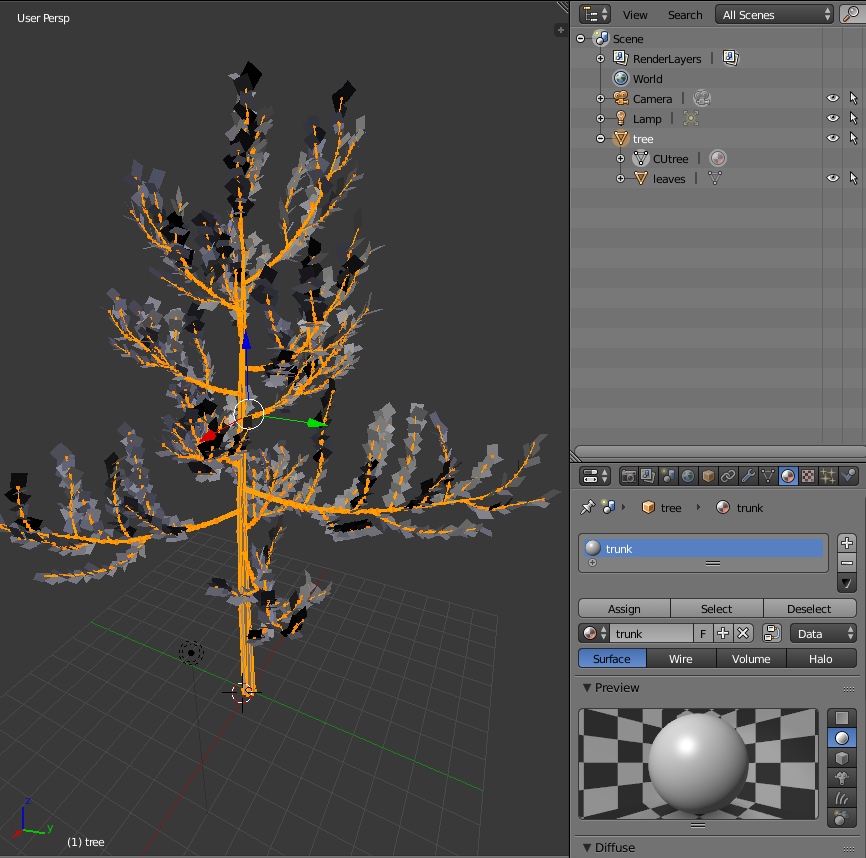
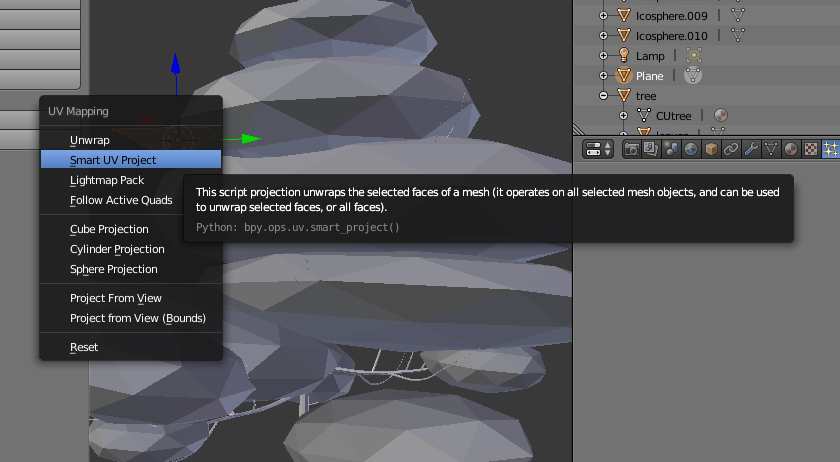
Then press Tab to enter edit mode, make sure all the trunk faces are selected (orange) if not, press A to select all of them. Then press U and select Smart UV Project.
Go to the Material tab, make a New Material. I named mine "trunk", and click Assign to assign those faces to the material. This makes it easier to apply a texture in Unity later.
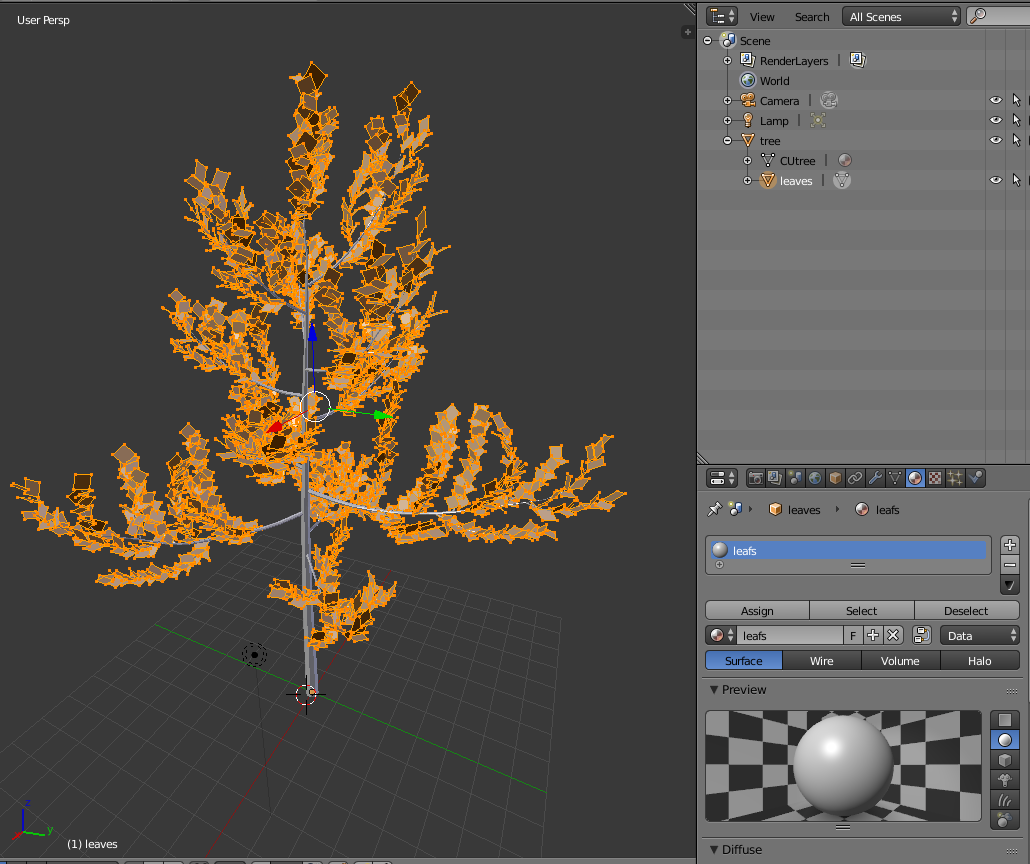
Now we add a material for the leaves. Select the leaves in the hierarchy, press Tab to enter edit mode. Make sure the leaves are all selected (orange), if not press A to select them all. In the Material tab, make a New Material. I called mine "leafs". Click Assign to assign those faces to the material.
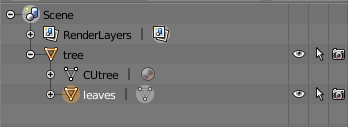
I like to delete Camera, Lamp and World cos they carry over to Unity when you export to .fbx, but you can leave them if you want. You can delete them in Unity, also.
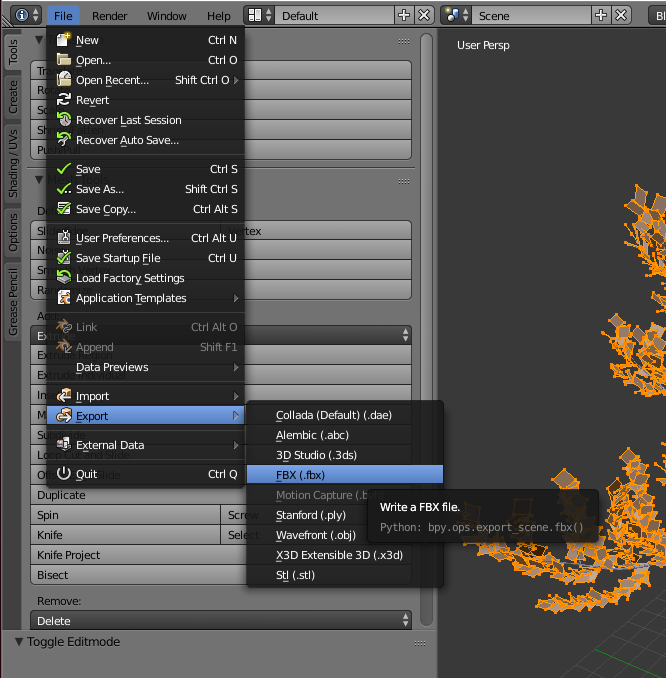
Export as .fbx, and import into Unity to test your tree. You can do this by going File > Export > FBX(.fbx).
So, in Unity, I added a clustered leaf texture .png to a double sided material. I also made a material in Unity with a repeating birch bark texture for the bark. You can use any leaf or bark texture. I found mine using an image search.
Sadly, this tree is cute but not what I am looking for. It's still not luscious enough. Let's try something else!
Let's go back to Blender and try a different approach for the leaves. We will keep the trunk, but hide or delete the old leaves.
We will now make blobs, which we will fill with leaves.
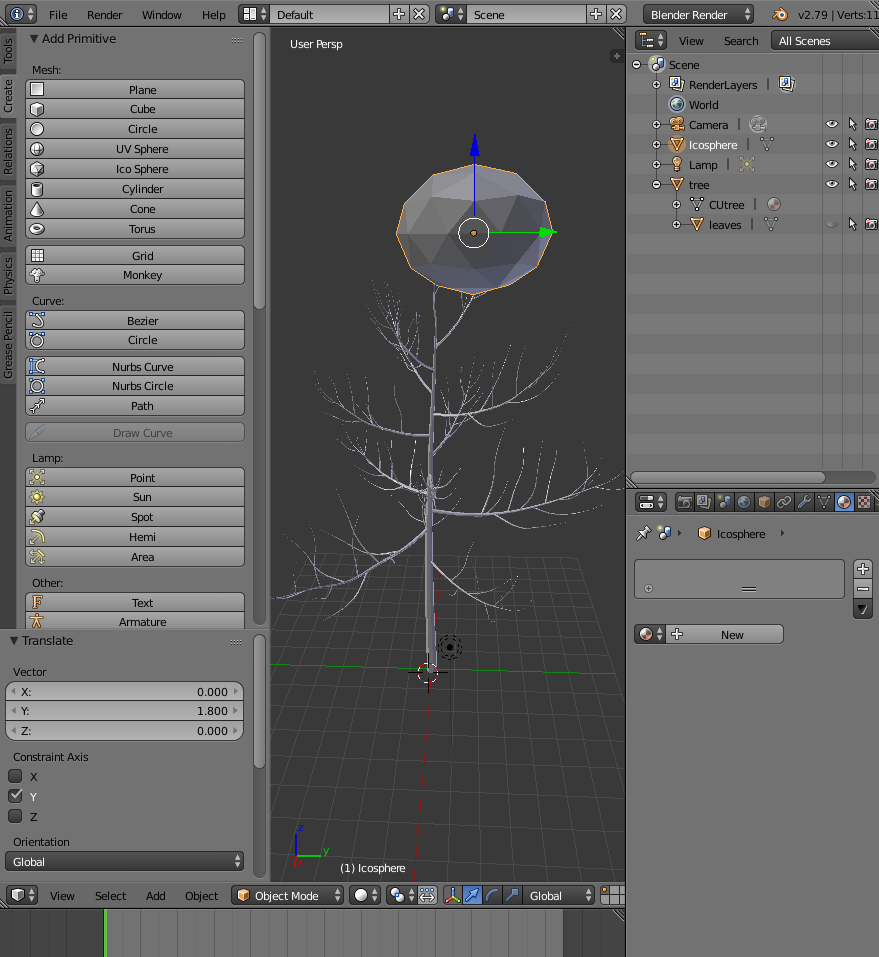
For this example, I made an Ico Sphere (in Add Primitive click Ico Sphere), and scale it by pressing S, and then either the X/Y/Z button to scale on an axis. I do this to make the blobs imperfect spheres, more oblong shapes. I also rotate the blobs by pressing R, then either the X/Y/Z button to rotate on an axis. I do this to place the blobs better on the branches, and create variety.
I’m repeating this until I have roughly enough blobs to represent the leaf canopy.
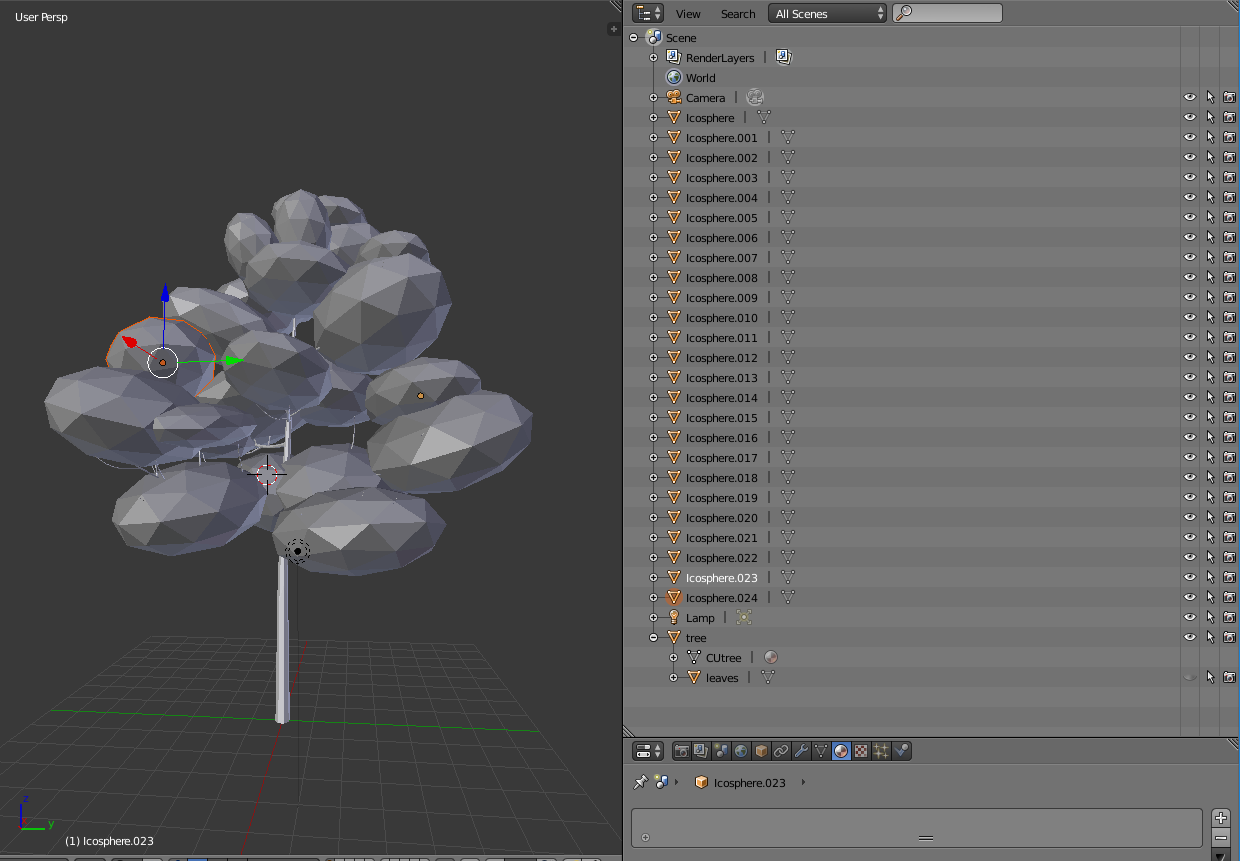
Actually, I think this is over kill for me. So I started over with new blobs.
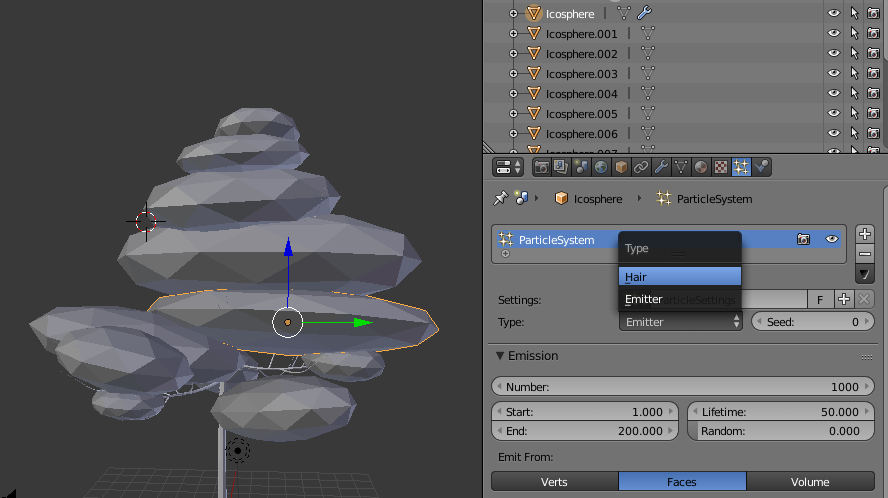
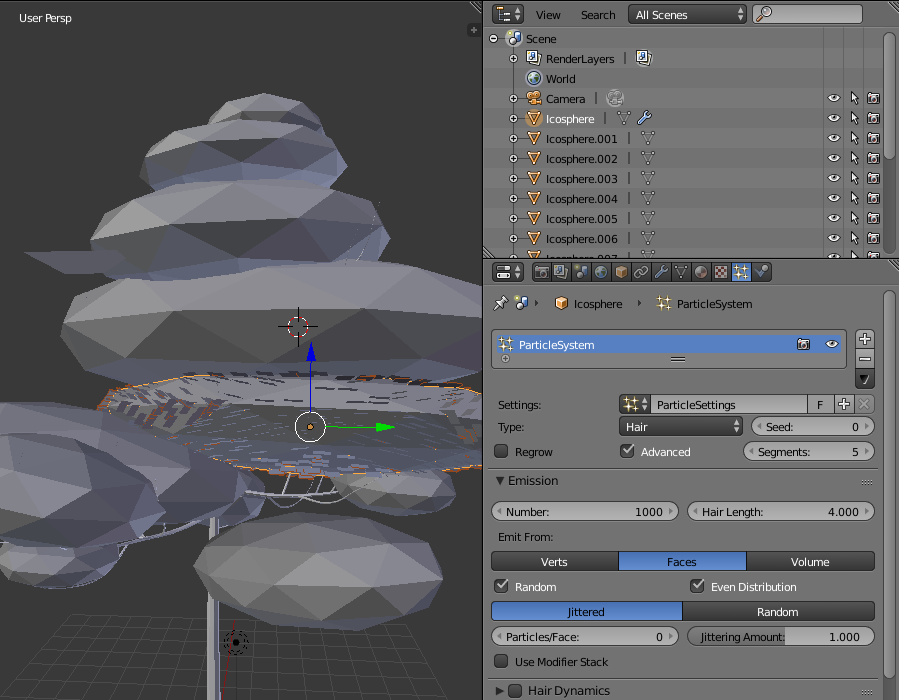
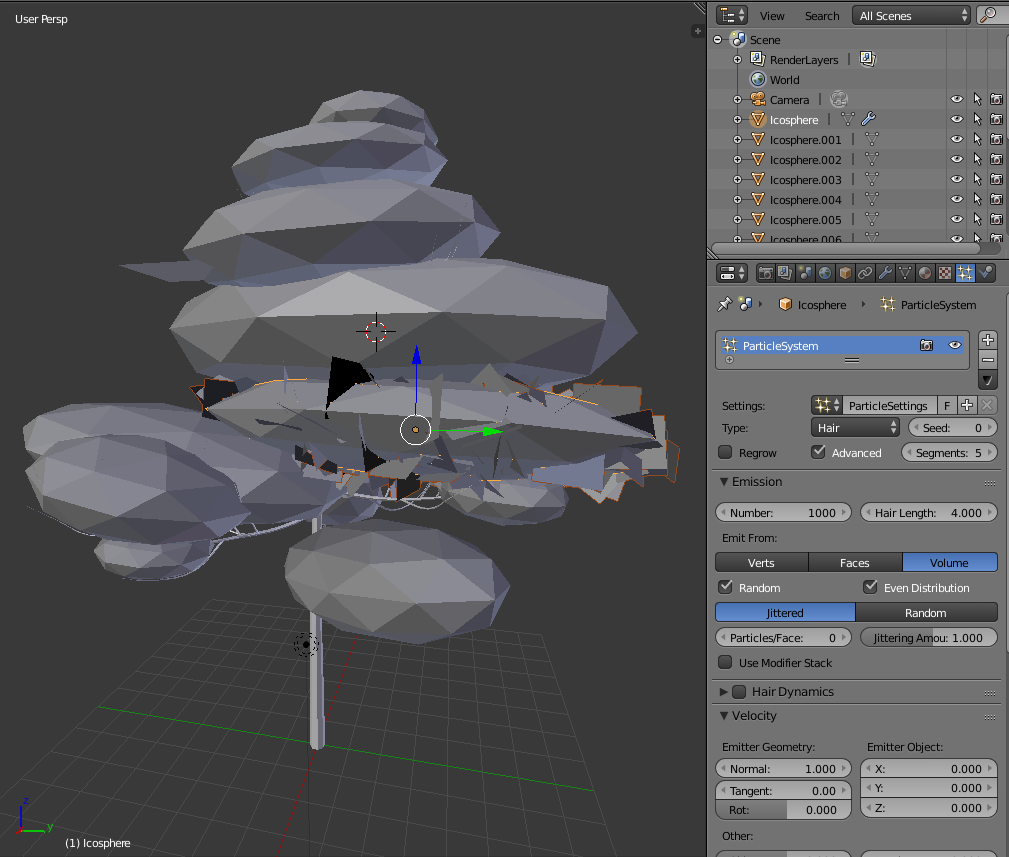
Now that my blobs are looking how I want, I select the first one in the Hierarchy and add a particle system to it. You can do this on the Particle System tab, and adding a new Particle System.
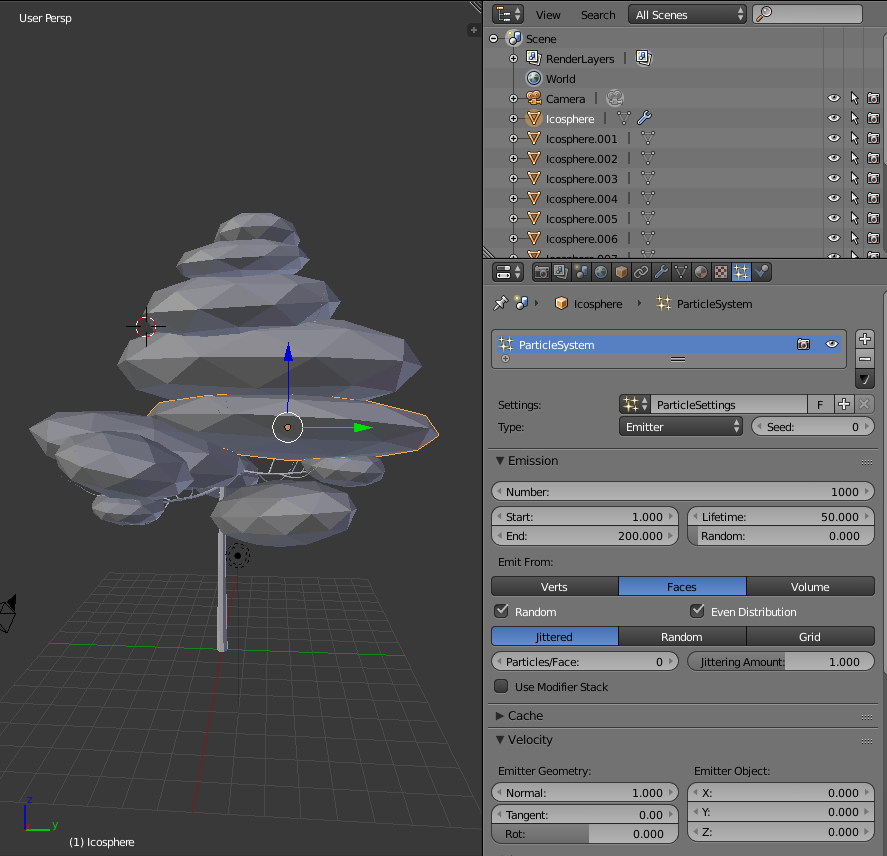
Set particle system Type to Hair. Emitters are cool, but for things like rain and sparkles. Hair is better for trees.
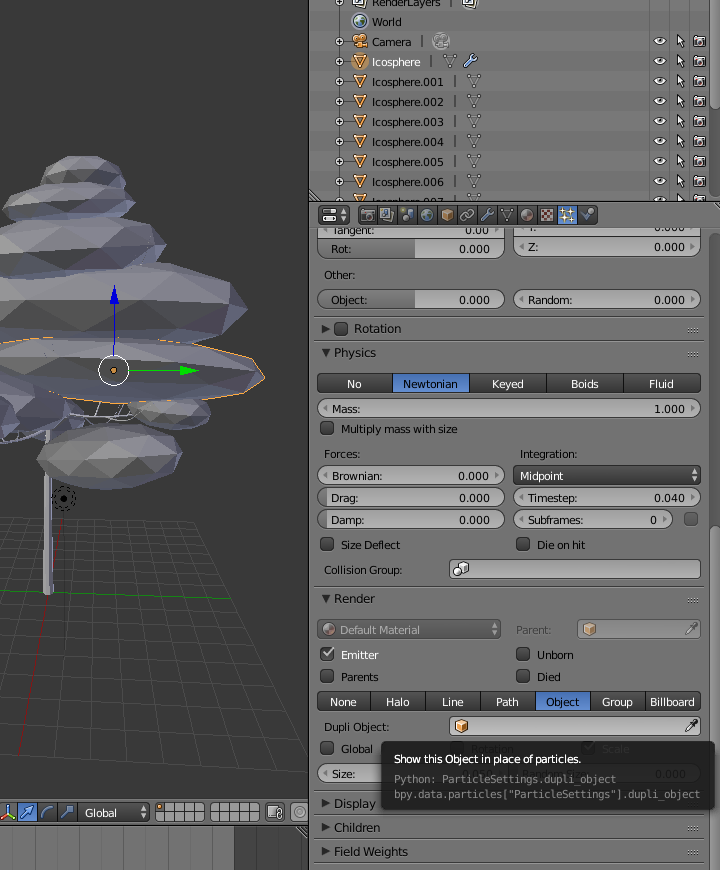
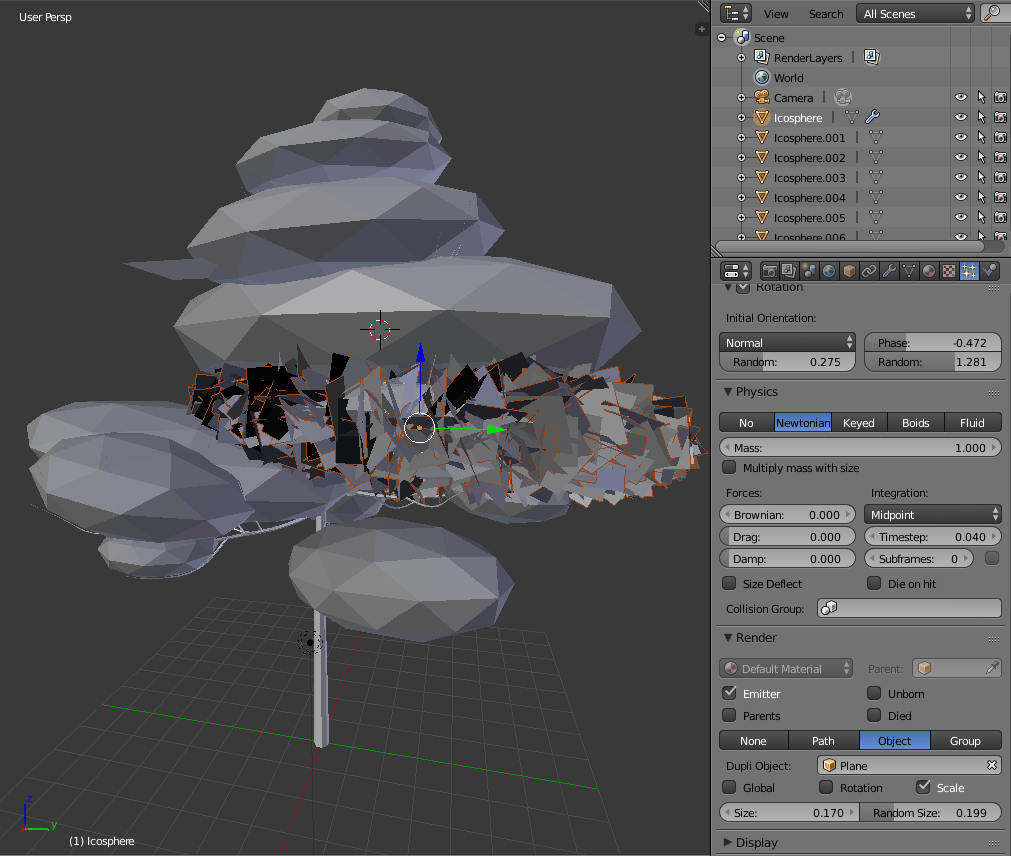
Set Render to Object. This will render the particles as an object of our choosing. We will use a plane, just the the Sapling Tree Gen does.
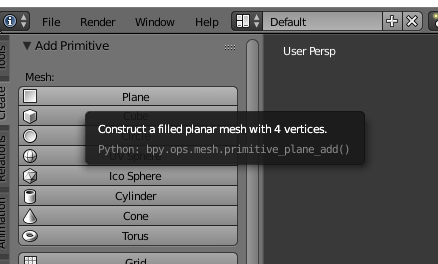
Make a plane (in Add Primitive click Plane).
With the Plane selected, unwrap the UV by pressing Tab to enter edit mode, make sure the plane face is selected (orange), if not press A to select, then U and Smart UV Project.
Select your first blob with the particle system, and in the Particle System we made, set Dupli Object to the Plane we just made. This is the leaf.

Check the Advanced box on the Particle System. New options appear!
Check the Rotation box to enable rotation options. Set Initial Rotation to Normal. Mess with the two Random sliders and Phase to get some variety in the leaf rotations.
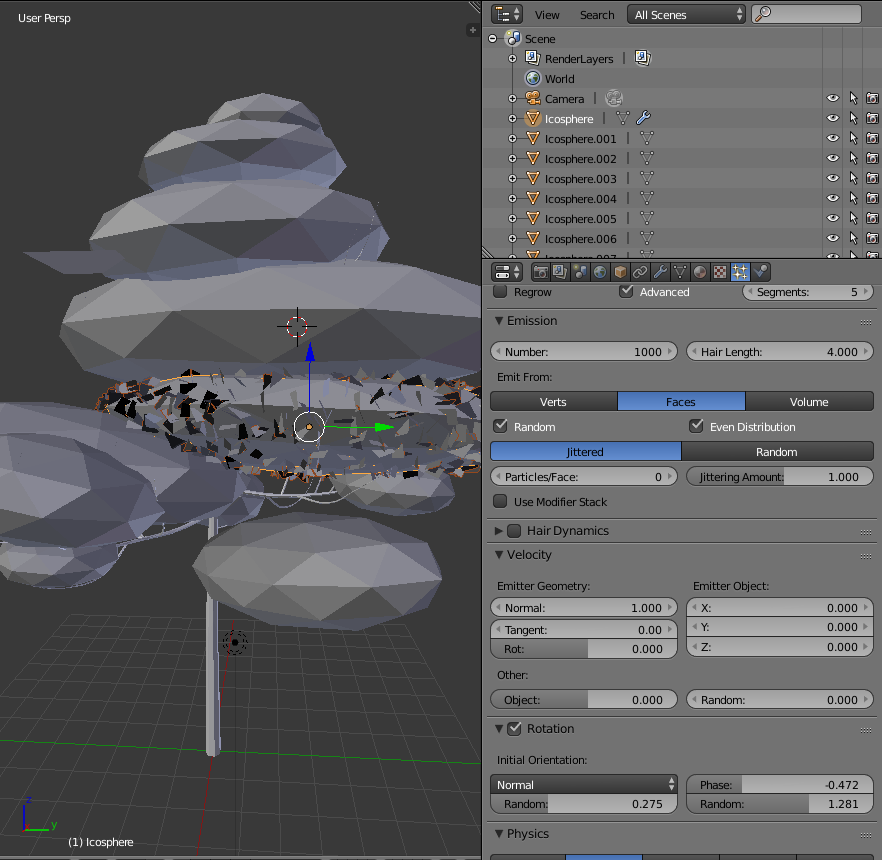
Looking spicy already.
Under Render, adjust Size and Random Size to get the planes a size and variety of size that you like.
In Emission, you can switch between Faces or Volume. Faces means the leaves will be only on the outside of the blob. Volume means they will fill the blob. Either works, choose what you like. I find Faces is more graphic and lollipop like, and Volume is shaggier and fluffy.
If you have multiple blobs, select them all, then select your original blob with the particle system last.
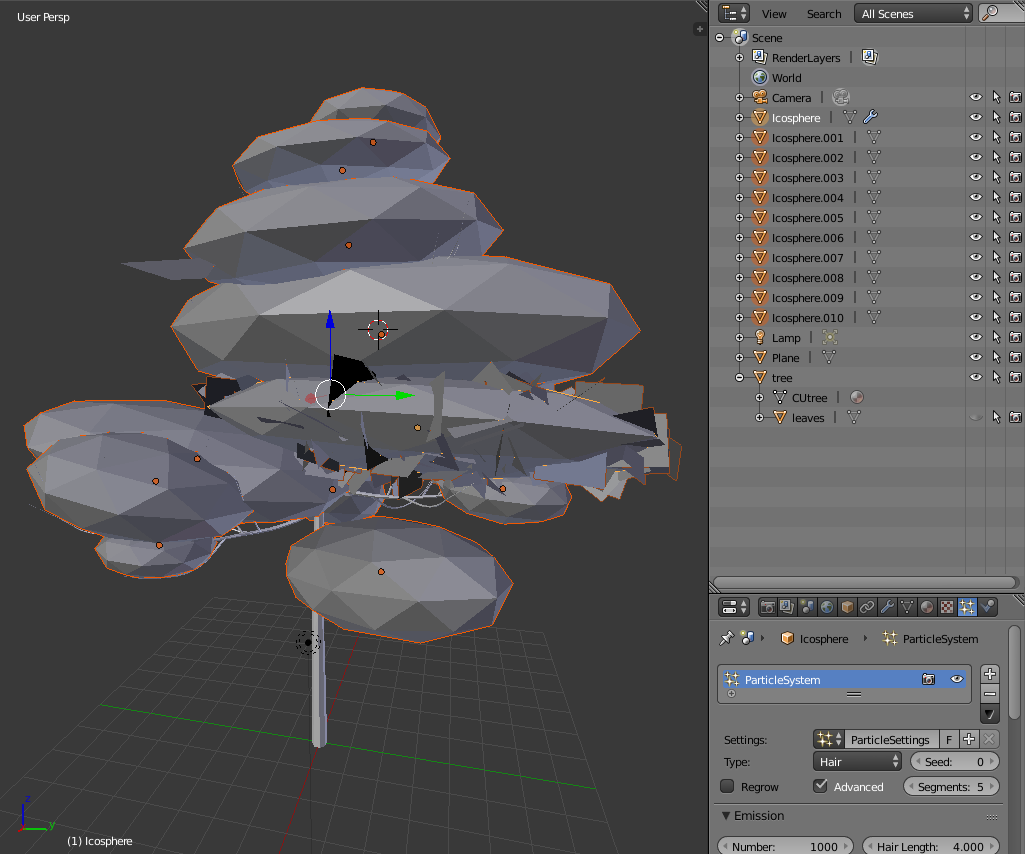
Press Ctrl + L then Modifiers to link the Particle System to all the other blobs.
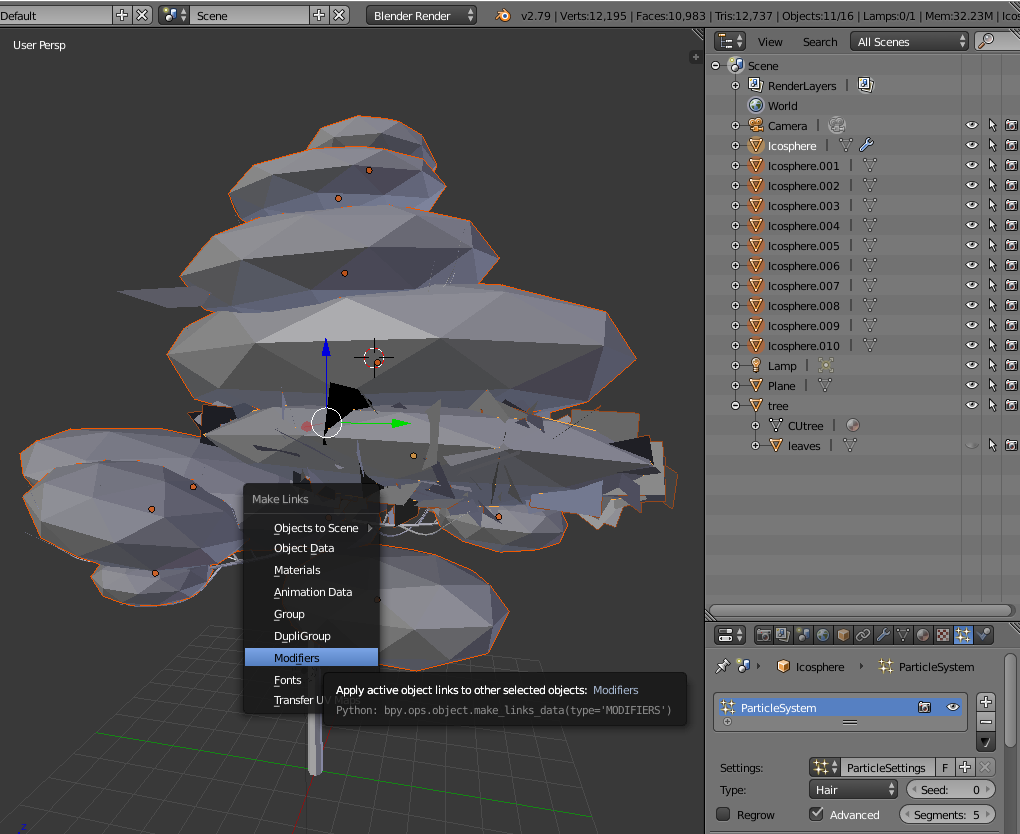
Now all the blobs have a linked copy of the particle system on them. If you change the parameters on the original blob, the rest will update too. The tree is starting to look floofy. That's great.
We could bring all the leaf blobs together now, and bring into Unity. Or we could work with the leaf blobs separately and do some magic with normals.
Let's try putting them together, first. Magic with normals? Uh. I will explain that later in this post, don't worry.
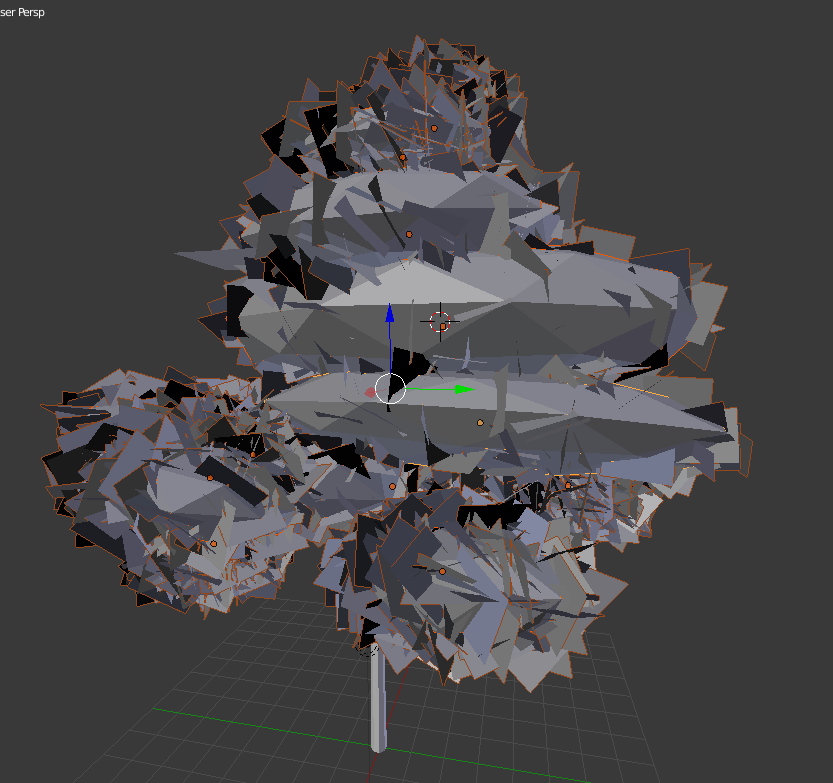
With just the particle blobs selected, press Ctrl + A, and all particles will turn into meshes (its going to be a lot! like 1000s). It might take a minute.

Press A to select everything, then in the hierarchy deselect everything EXCEPT the leaves (deselect all your original ico sphere blobs, the original tree object, the first plane that the particles are made of, all by holding Shift and left clicking) and make sure the active object (white text) is a leaf (hold Shift and left click a leaf to deselect and then hold Shift and left click again to select it).
Then press U and select Object & Data & Materials+Tex.
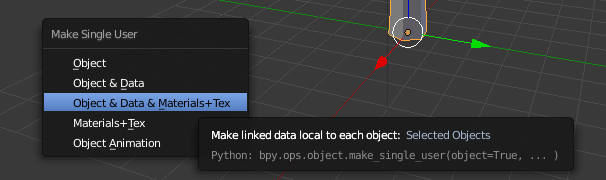
The press press Ctrl + J to join the leaves into one object.
At this point, I took a break and when I came back Windows had crashed. Windows is really good! Somehow in the excitement, I forgot to save. From here you can clean up the file and export as .FBX and test in Unity just like the first tree (go back to that section if you want to see the steps again). But I can't show you this cos I lost the tree...
So... with my old tree dead, I made a new tree with Sapling Tree Gen, just like before.
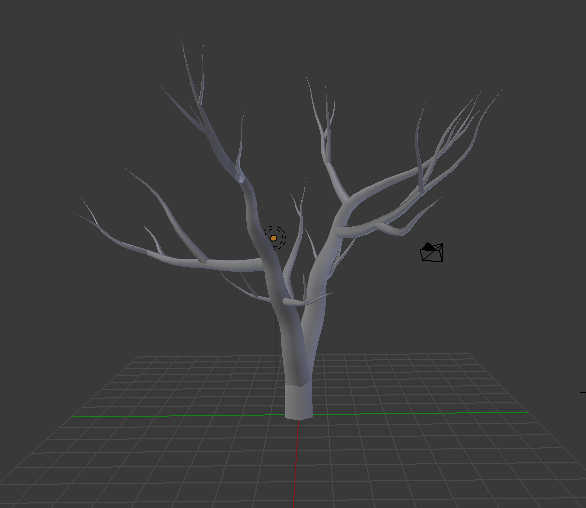
Here's the settings. I also used Branch Radius this time, and some other growth factors to make it a bit fatter. I thought the first one was looking a bit thin anyway.

Always save and increment your files, folks!
Anyway, now I add the blobs again, just like before with Ico Spheres.
I made the particles system and linked them to all the blobs as before, but this time I'm going to join the blobs separately instead of together. I am going to modify the normals of the leaf blobs. This will create a more stylised leaf look - instead of looking a bit haphazard, the circular normals will create an effect of volume and translucence. You'll see what I mean soon.
Select the first blob in the hierarchy, press Ctrl + Shift + A to make the particles into meshes. Deselect the original blob, then make one of the leafs the main selection (white text). Press U and select Object & Data & Materials+Tex. Press Ctrl + J to make the leafs one object. That's one leaf blob, 7 more to go.

Do the same steps for every blob, in order in the hierarchy.
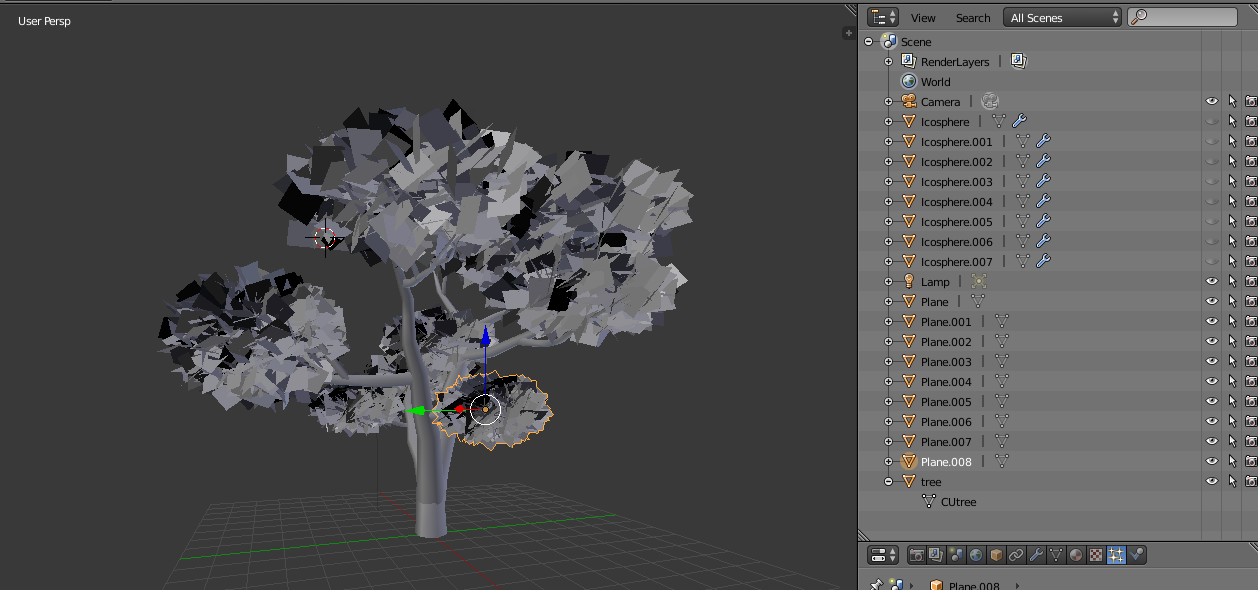
When the leaf blobs are done, hide the original blobs, and now you can see only the blobs of leafs.
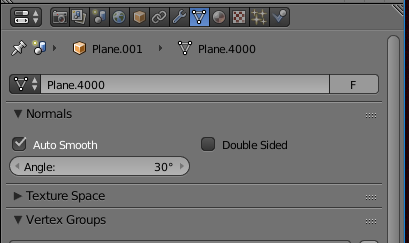
For each leaf blob, set the Normals to Auto Smooth with the check box in the Mesh tab.
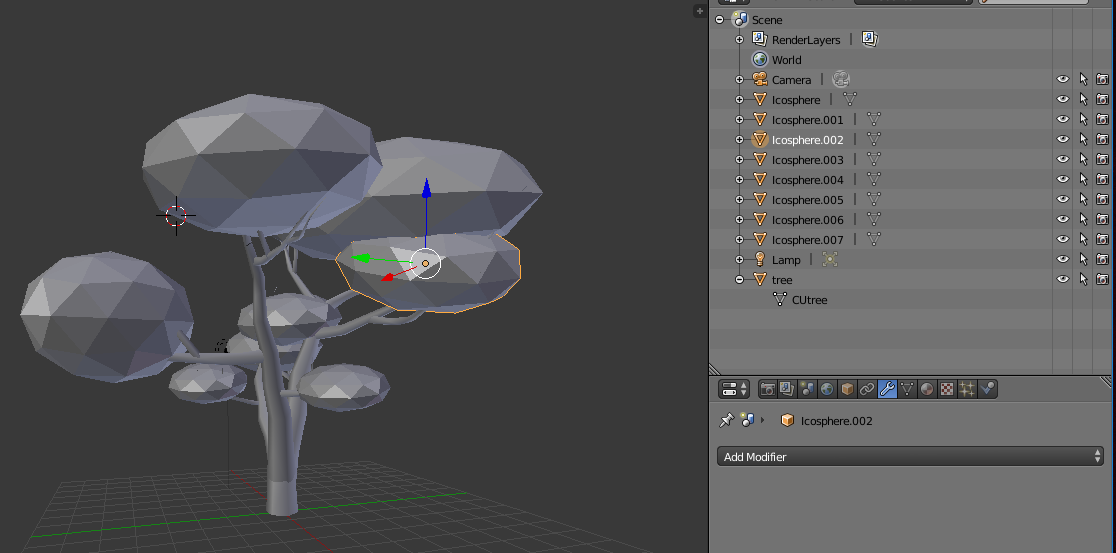
Add an Edit Normals modifier in the Modifiers tab, and set the Target Object to the original blob used to make that leaf blob. For me, I know which one to use cos it's the same number as the plane -1. Ex: Plane.001 should have Icosphere assigned. Plane.002 should have Icosphere.001 assigned. And so forth. If you did them in order from top to bottom like me, you should be in the same situation.
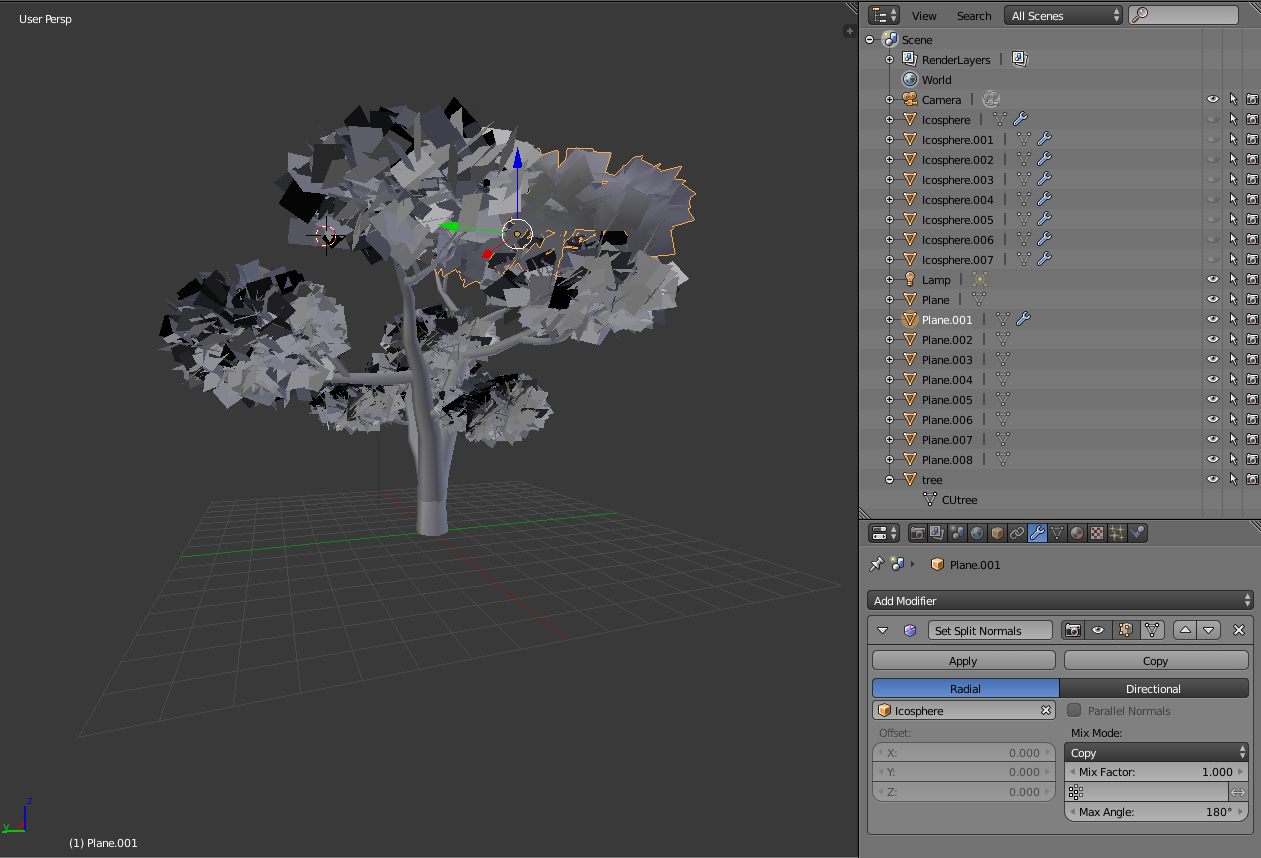
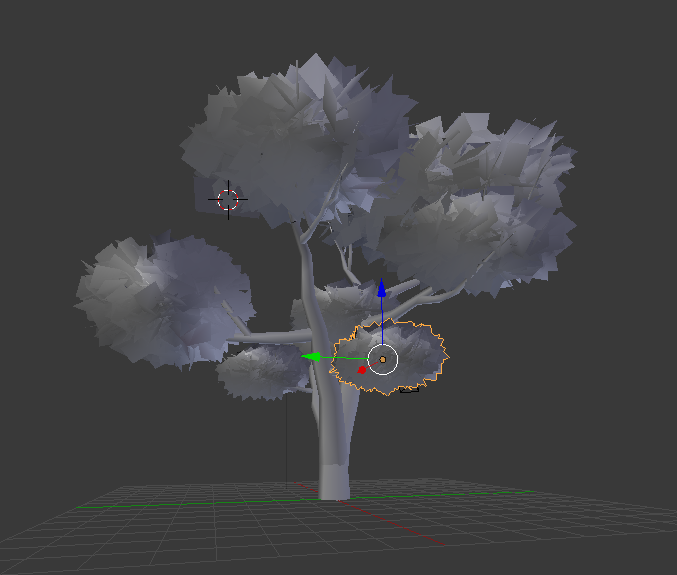
You can already see the difference in the leaf blob with the edited normals. The circular normals based on the original blob give an appearance of round fullness to the leaf blob, as oppose to a more chaotic look with standard normals. This is purely aesthetics, it's totally fine to leave the normals as is, if you wish.
If you like the circular normals, repeat for each leaf blob. They look cool now, no?
So thats basically done. Let's prepare to export to Unity now.
Delete the original plane, and the camera/light and original blobs if you want. You don't need them in Unity.
I add a decimate modifier to the trunk, just like before, to reduce a few polygons and I like the look of a low poly trunk.
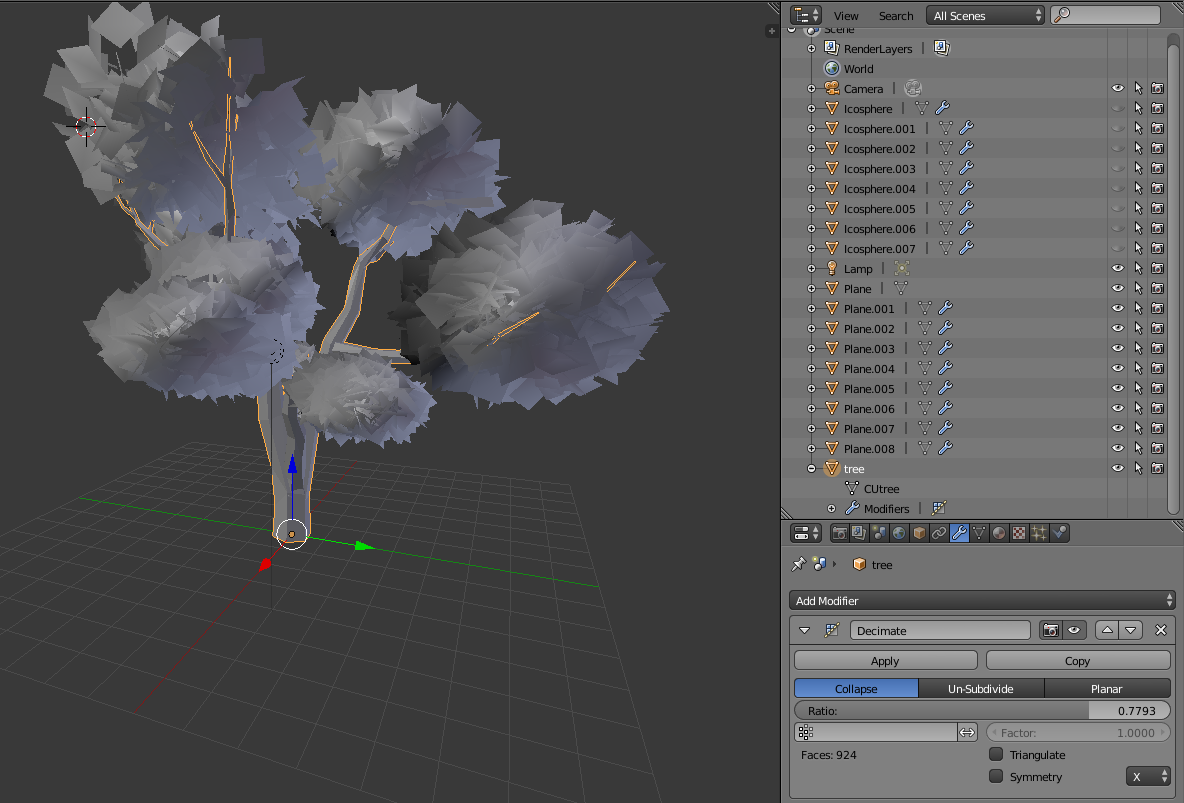
I also merged all the leaf blobs by selecting them all and pressing Ctrl + J. I also assigned all the leafs to a material, and the trunk to a different material just like the first tree - again this makes it easier to assign materials in Unity.
When you're ready, export as .FBX. Import into Unity. In Unity, I added the same leaf and bark materials as before. I tried double sided and single sided for the leaves, and I decided I like single sided better even tho it looks a bit more sparse - the effect of the circular normals is smoother with a single sided leaf texture.

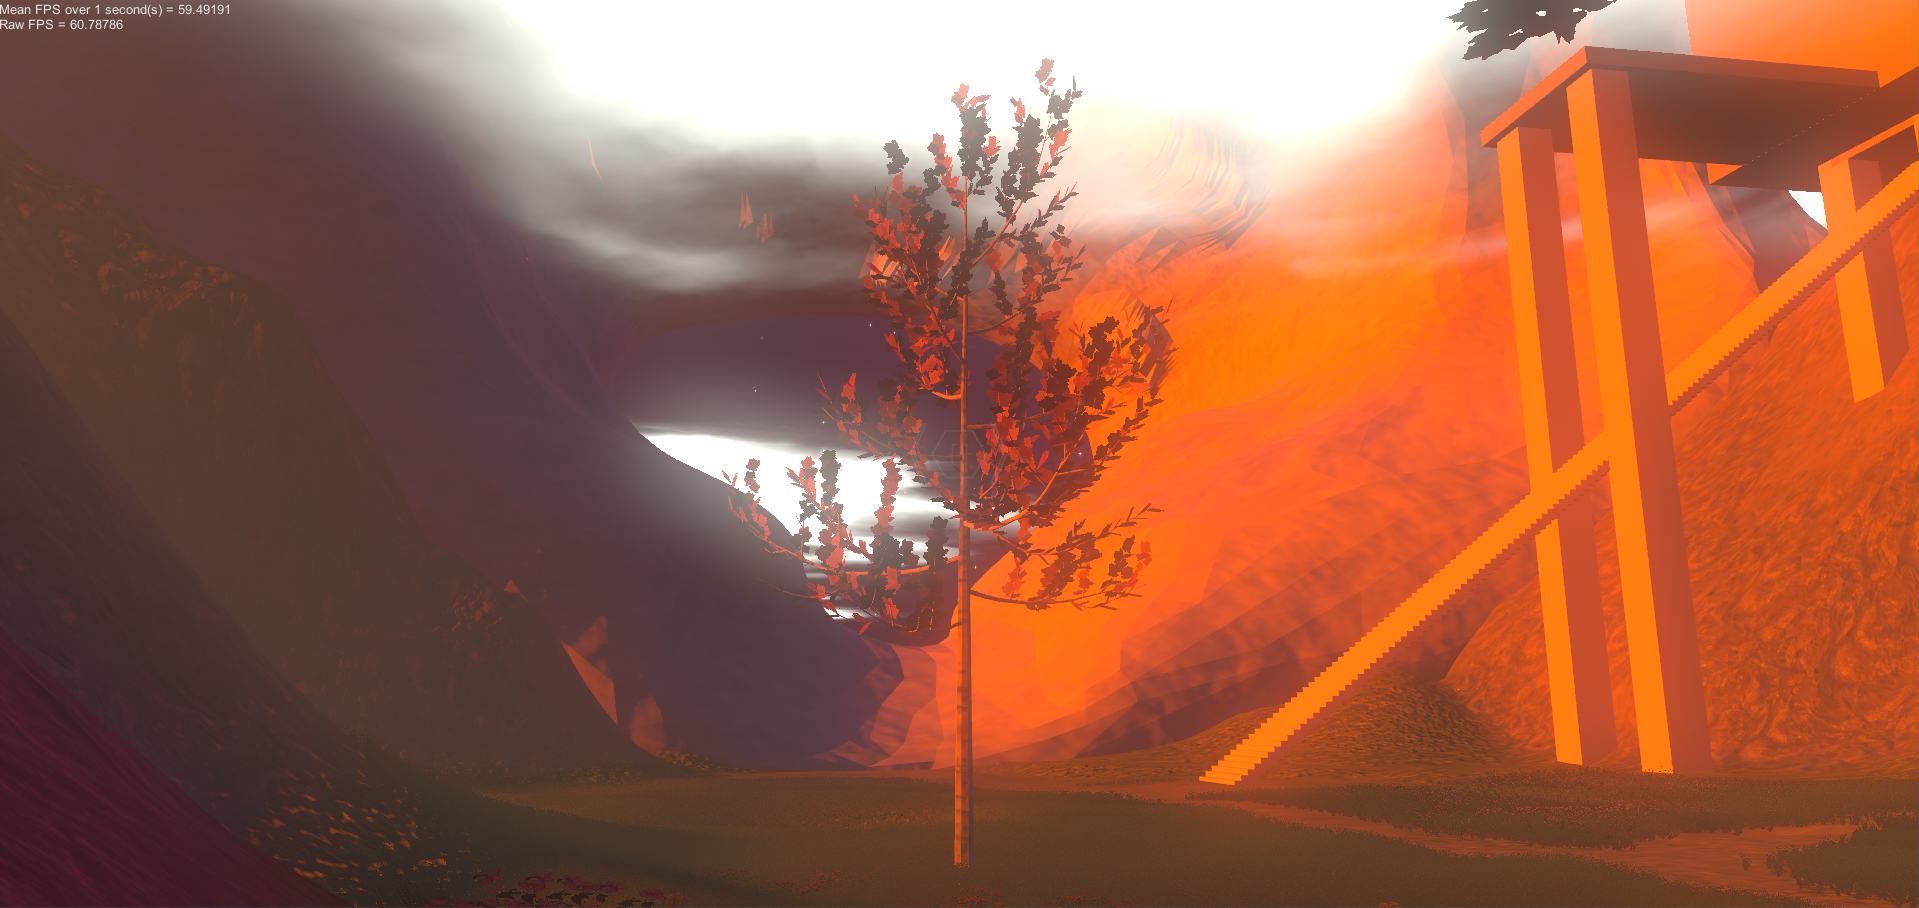
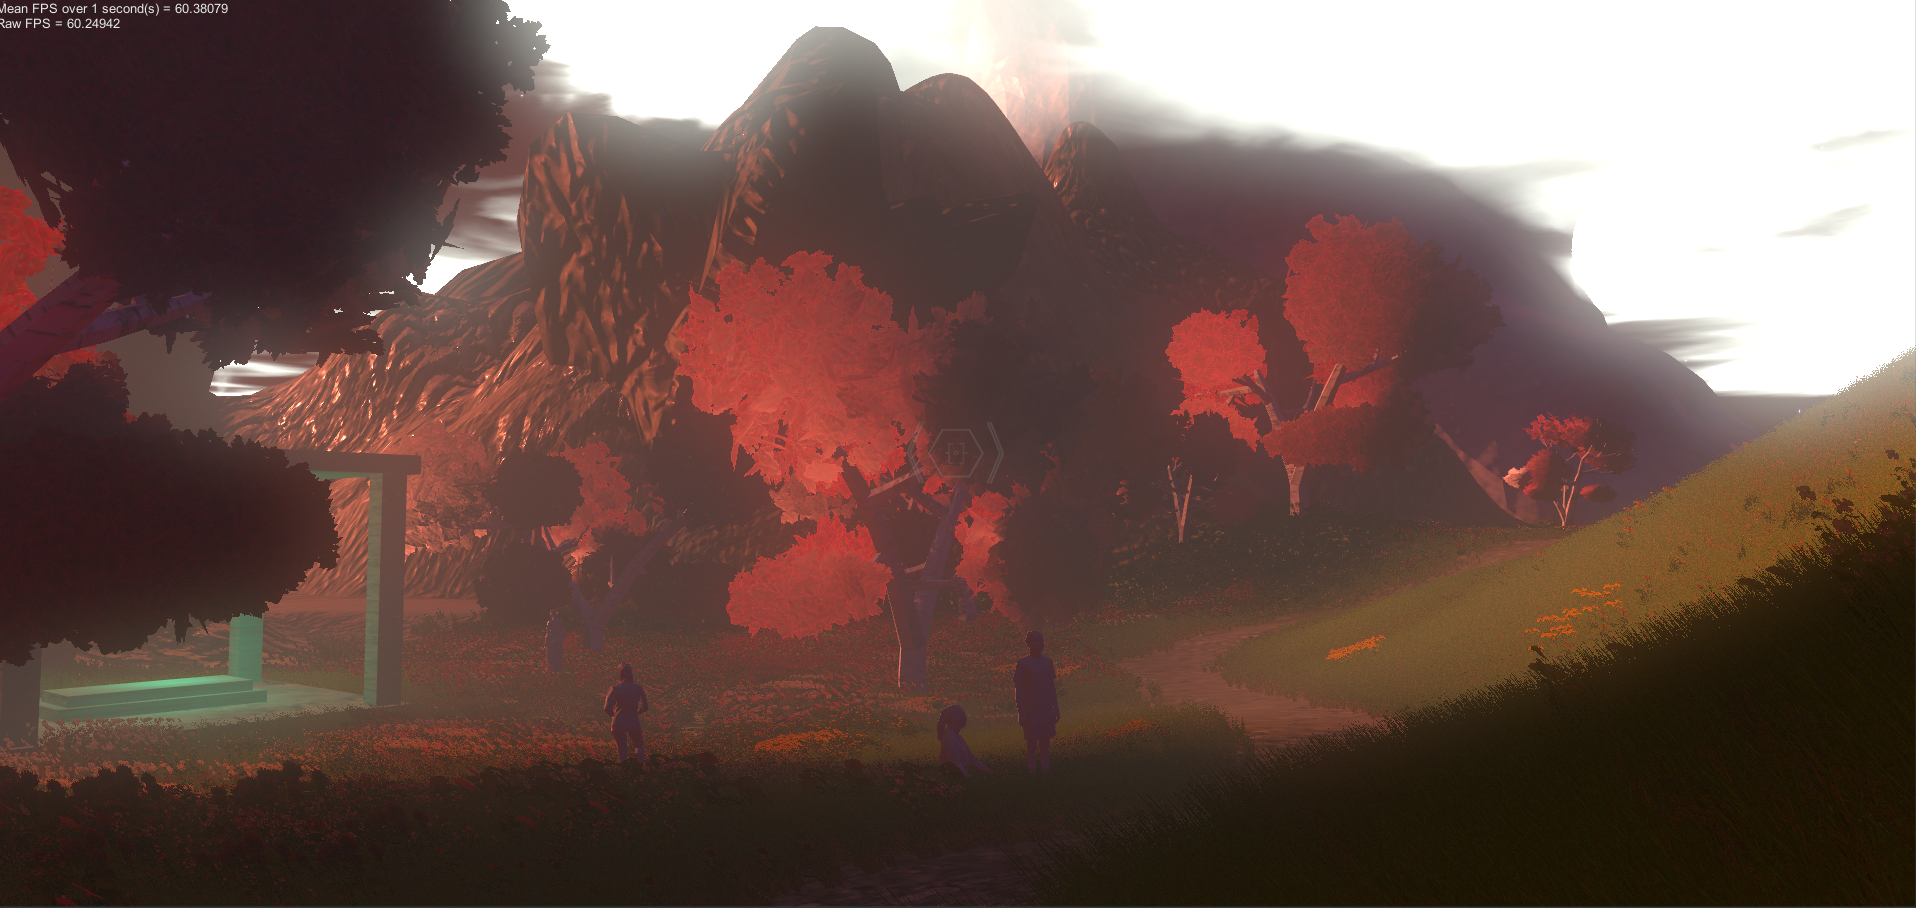
The circular normal tree is looking pretty lush and fluffy, this is closer to what I want. It's not perfect, but I am happy. I will try again later with the same techniques to get closer to Stephens tree sculpture.
But for now, I think I can work with this tree to make a pretty decent luscious feeling forest.
If you got this far, I hope you at least have a lovely tree out of it.
Don't be afraid to experiment with different kind of blobs. How about just one big blob for all the leaves? That would be way easier, actually... 🤔 Maybe try more particles and get a dense tree. What about using less particles, but the texture is like a little baby branch? Very economical. Maybe skip the particles, and just use the ico sphere blobs and have a very low-poly lollipop tree. Maybe you will get better results than me with the Sapling Tree Gen leaf system? Maybe you can make shrubs with squat little tree settings? Who knows what you can do when you jiggle the settings a bunch.
Have fun with it. I believe in you. ✨